How to Enable XERO Integration
- Anne Pascual (Deactivated)
- Brevity Care Software
- Former user (Deleted)
- Harvey Mediran
Follow the step by step guide to connect to your XERO account and sync the data from Brevity or XERO:
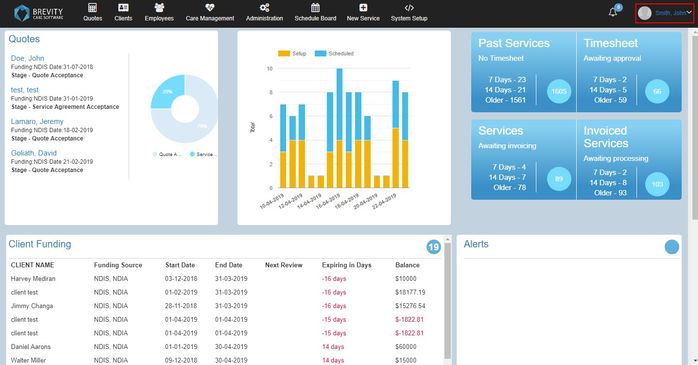
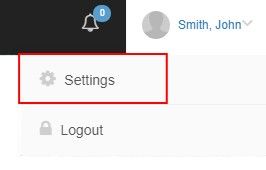
1. Click on the username that can be found on the upper right corner of Brevity Software.
2. Click on the settings from the dropdown menu.
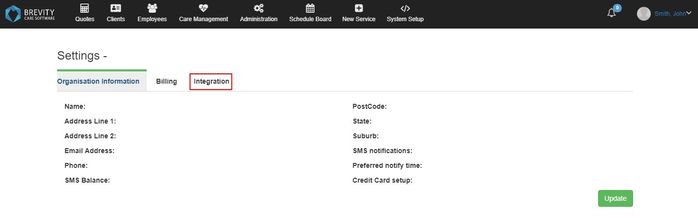
3. It will open the settings page of Brevity, Click on the Integration tab to open the integration page.
4. Click on the XERO Enable Button to Enable the XERO in your Brevity.
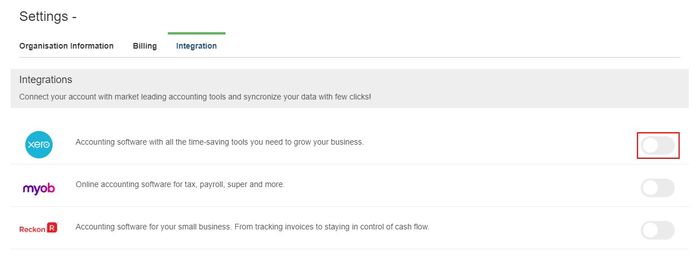
5. If you want to change the mappings for Brevity to XERO or vice versa, you can click on this guide for the mapping (XERO Mappings). By default, Brevity has already configured the mappings for XERO
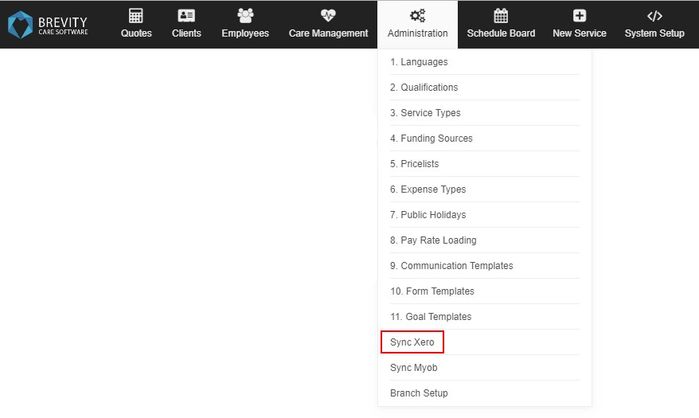
6. After enabling the XERO in your Brevity. You can start syncing by going to the Administration from the Main Menu and then clicking on the Sync XERO from the sub menu.
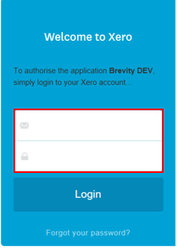
7. Click Connect to Xero

a. It will ask you to input your XERO account. Sign in with your XERO username and password.
b. Click allow access and you will now be redirected to the Brevity page.
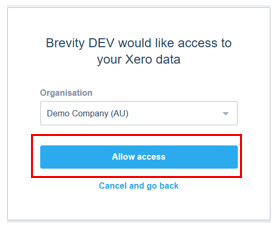
c. It would now say you are connected.
8. Go back to the Brevity website to sync data in Xero.
9. Select Sync Xero from the Administration menu.
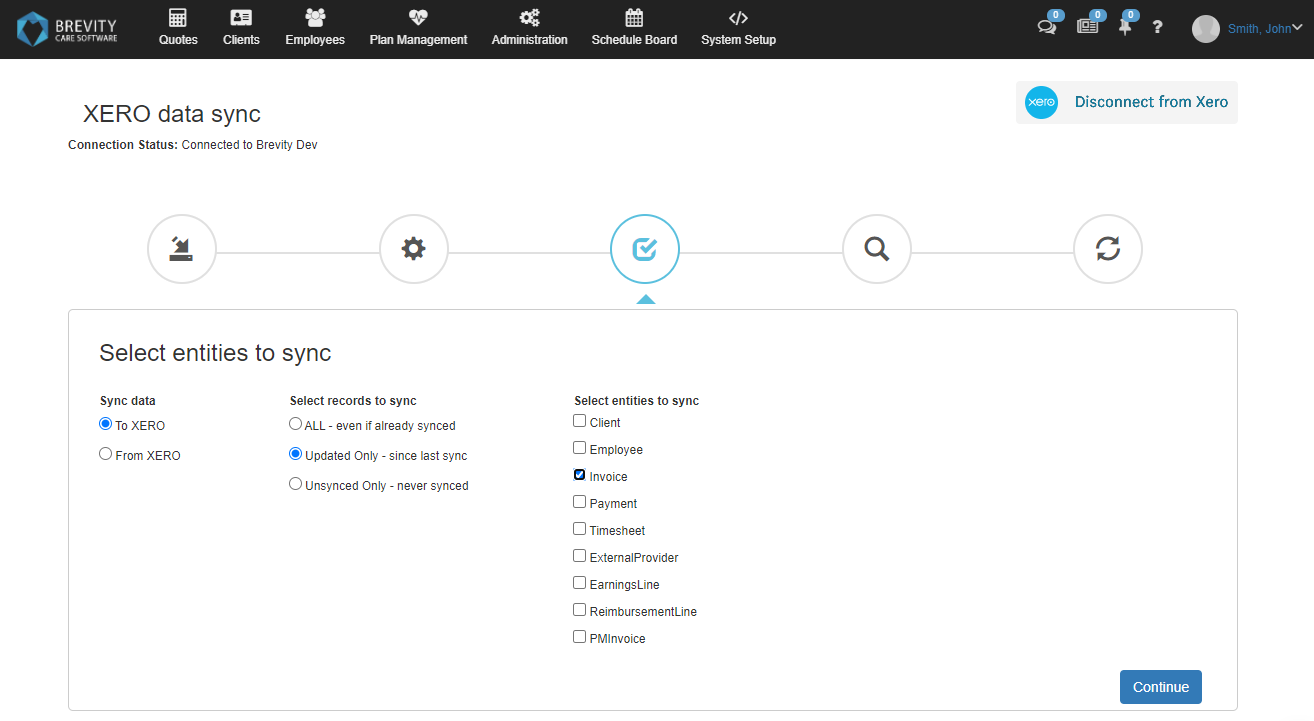
10. It will show you the XERO data sync page. You can select several options in syncing the Xero to this page.
Sync Data - You can select if you want to sync from XERO to Brevity or Brevity to Xero.
Select Records to Sync - This section will give you three options.
a. ALL - You can select all which will sync all the record even if it is already synced. Take note that this will double the record in XERO
b. Updated Only - This option will check for any updated records and it will sync to Brevity or XERO.
c. Unsynced Only - This option will never sync the data from Brevity or XERO.
Select Entitied to Sync - You can select different sections from Brevity or Xero. You need to select an entity if you are syncing the data from Brevity or XERO.
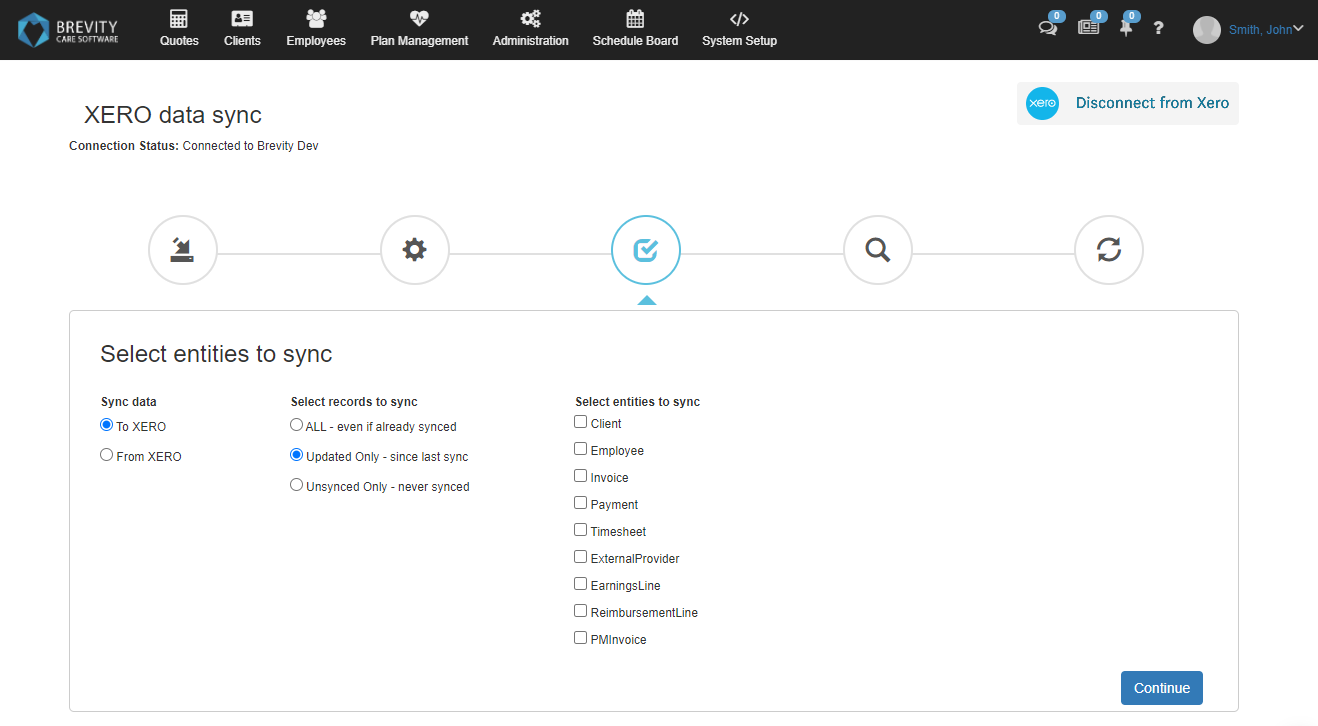
11. Click continue to see the data preview.
You could only sync one entities at a time. If you try to select multiple entities, it will have an error when syncing the data between Brevity and Xero.
12. All the data for the selected entities are shown in tabs, you can click the tabs to see the entity data.
13. If there are validation errors, then those are highlighted in red, you need to correct them before the sync otherwise those records will be skipped during data sync.
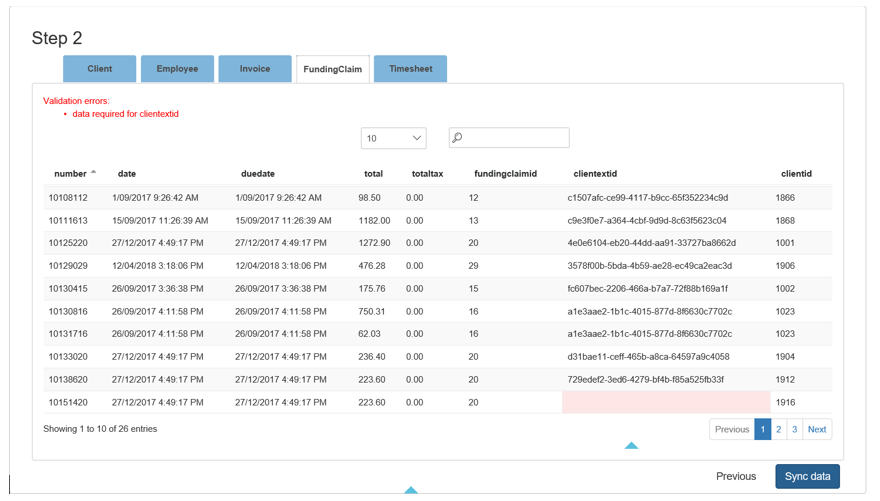
14. Click sync data to start with the data sync process.
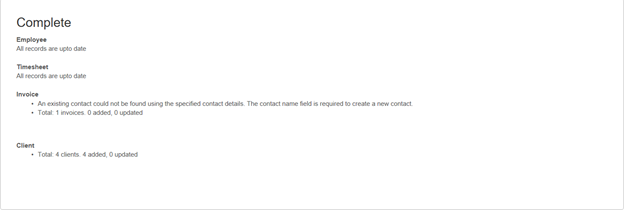
15. The status of the data sync will be shown in the next screen.
Syncing invoices and timesheets:
Related content
Copyright © 2019 Brevity. All Rights Reserved