User Roles
User Roles enable permissions for different types of users to be set and the general management of roles. Roles are assigned to user when their login is created.
Admin - These users have unrestricted access.
Super User - This role is similar to admin but cannot access System Setup or manage logins.
User - These are users that only have access to specific functions and tables. They can only view tables that have been set up by an Administrator, such as Client and Employees tables.
Support Worker Apps Only - These users can only access the mobile app and the Support Worker app ( see Brevity Mobile App Guide). They cannot access the core Brevity software.
Self-Service Portal - These users can access the self-service portal (see Self-Serve Portal Guide). The self-service portal enables Self-Service users to view client funding, create session notes and create sessions for clients that are assigned to them.
You can manage the role of the User from this page. You can set the roles of the user, manage different kind of roles, and set the table and field permissions. You can access this page by clicking on the System Setup from the Main Menu.
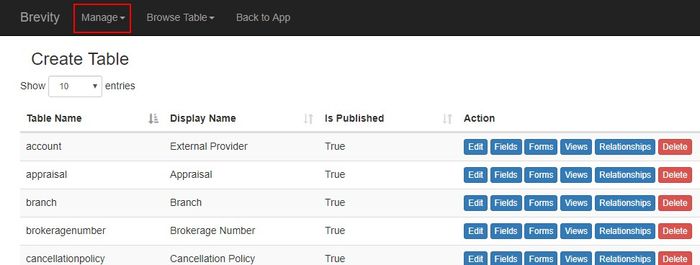
By default, it will open the list of tables. Click on the Manage button to show the list of available Menu
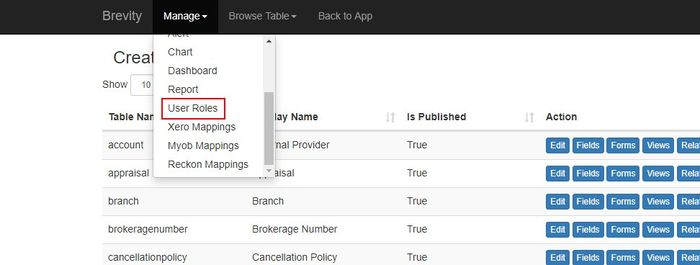
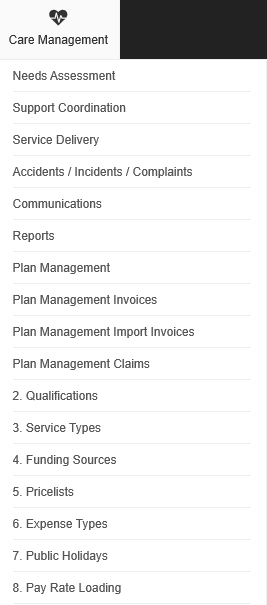
From the list, click on the User Roles to access the User Role page.
These are the topics on this page:
User Roles
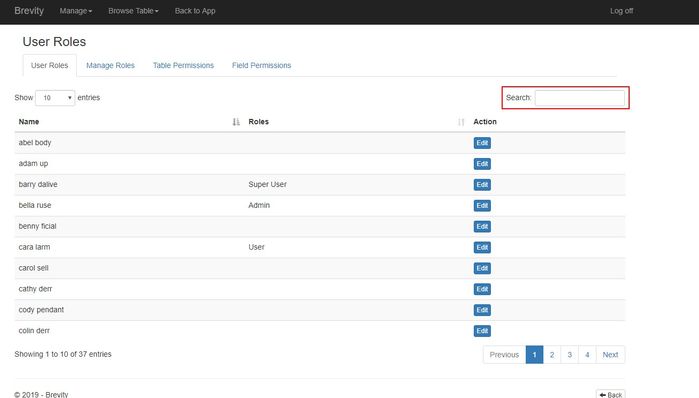
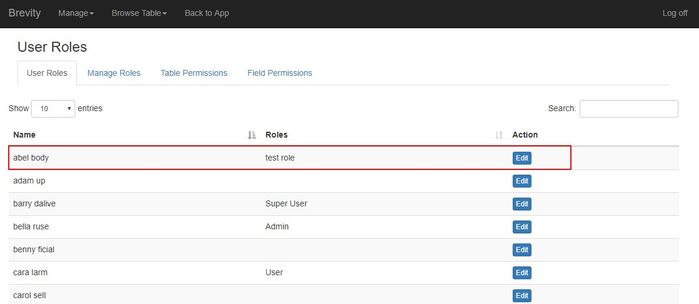
It will list all the Users (these are the employees record from Brevity) on the table. You can use the search box to search for the user and it will show you the employee's role.
This section is just for viewing the employee's role. If you want to assign the employee's user role, you need to go to their profile and then click on manage login. That is the section where you could assign the employee's role.
Manage Roles
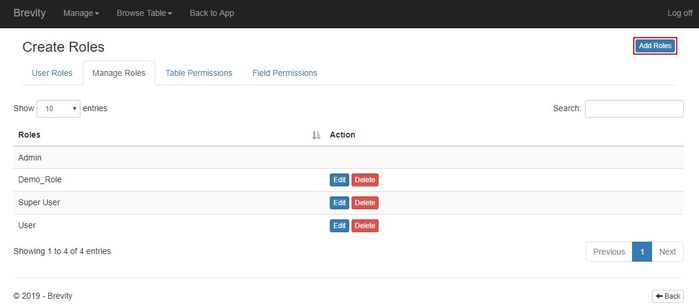
You can create, edit and delete the different roles from this section. Admin Role is the only role where you cannot edit or delete the role.
Adding a Role
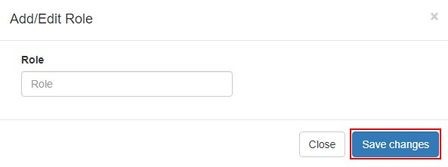
You can add a Role by clicking on the Add Roles Button from the upper right corner of the page.
Fill in the name of the Role. Once you created the name of the role, click on the save changes button to create a new role
Editing the role
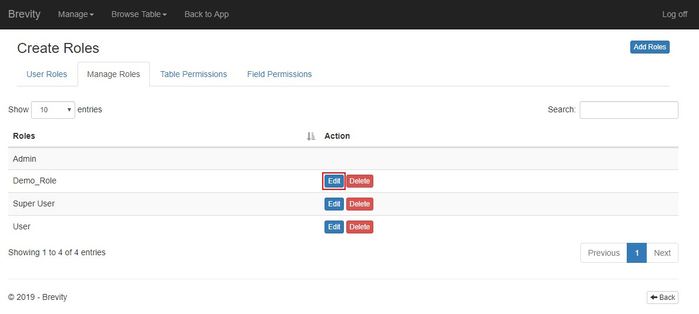
You can change the name of the role by clicking on the Edit button.
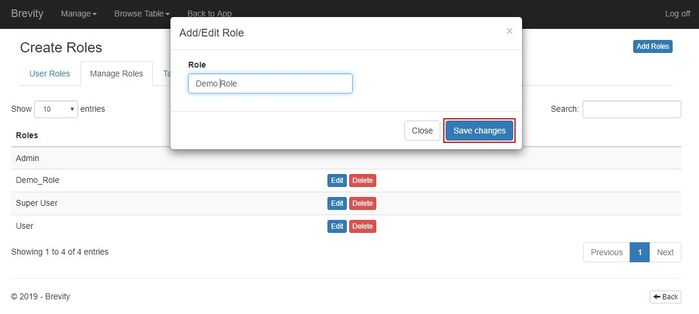
Fill in the new name of the role. Once done, Click on the save changes button to save the new name of the role
Deleting the Role
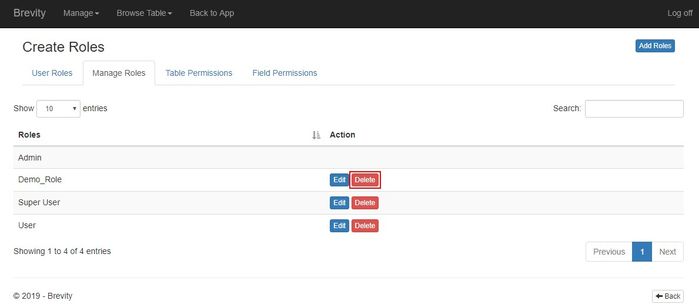
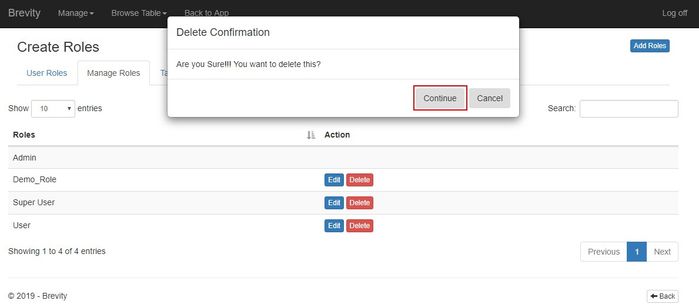
You need to assign another role to the user if you delete the role from this page. You can delete the role by clicking on the Delete button
Click on the Continue Button to confirm deleting the role.
The table from the User Roles will still show the user with deleted roles. This will help you to select another role for the user.
Table Permission
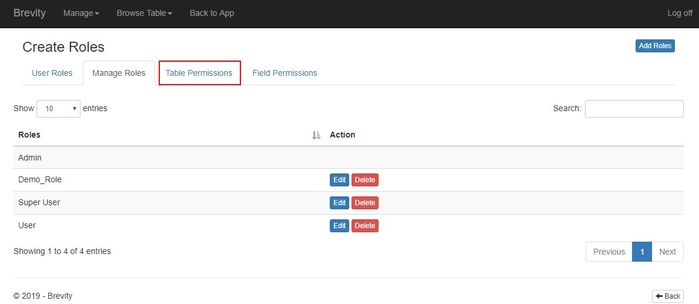
You can select the table permission that each role could view. Click on the Table Permission tab to access the table permission page.
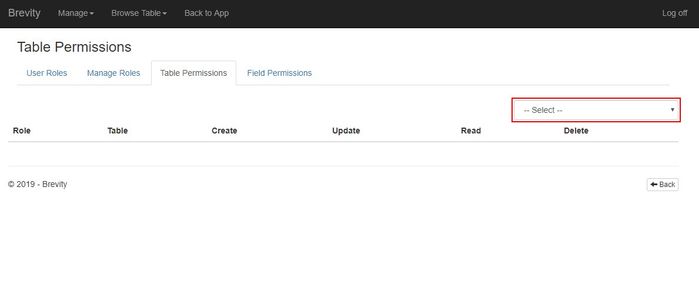
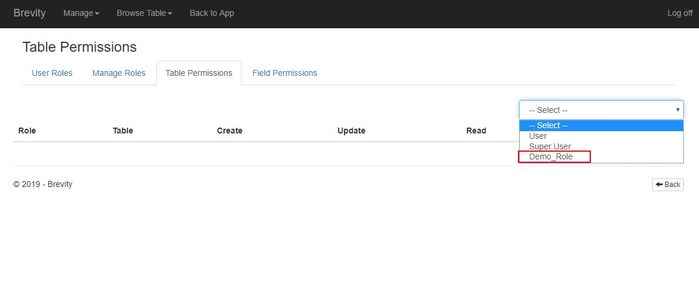
You can select the roles that will show the table permission by clicking on the role dropdown.
The created role will be shown from the list. The admin role will not be included because it has all the permission to view the table and the fields. Select the role from the list that you want to show on the table
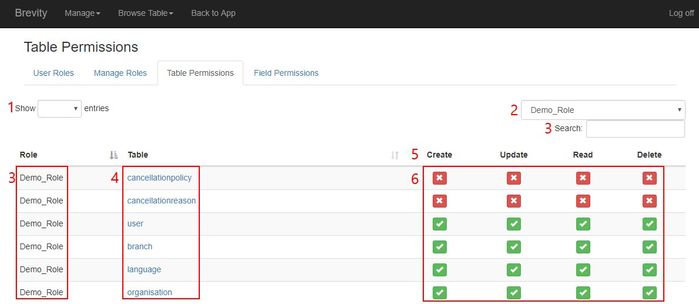
It will show the tables from Brevity. You can use several functions on this page to set the table permission of the role.
- Show Entries dropdown: You can use this to set the number of entries that can be shown on the table. 100 is the maximum entries that can be shown on the table.
- Role Dropdown: This will let you select the roles of the user. The table will show the permissions for the selected role.
- Role Tab: The role the is currently selected
- Table Tab: These are the tables within Brevity. Clicking this will either allow or reject the create, update, read and delete table permission to the role.
- Permission tabs: This will show you the different permissions of the table
- Permissions: You can click on these icons to allow or reject the permission of the role. Red X means that role is rejected and green check means that the permission is allowed.
Field Permission
Field Permission is a section from the User Roles wherein you can set the specific role to hide or just view a field from Brevity. Each page in Brevity has fields. An example of the field is the Name of the client, address, and phone number.
Adding Field Permission
You can add the Field Permission by clicking on the Add Permission button that is located on the upper right corner of the page.
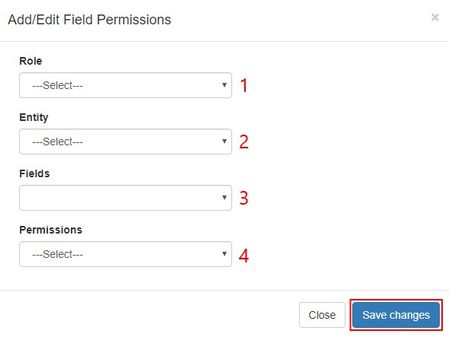
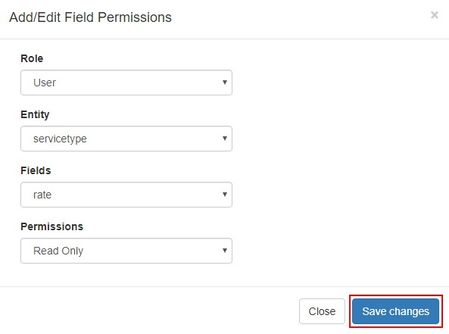
The Add / Edit Field Permission window will pop up. Fill in the details for the Field Permission to add a field permission to the role
- Role Dropdown: You can use this dropdown to select a role that will be adding the Field Permission
- Entity: The Entity is a section from Brevity like user and service schedule. The entity holds the fields in Brevity.
- Fields: You can select the fields from the entity you selected. This fields holds the value of the entry in Brevity.
- Permissions: You can set the permission if you want to make the field a read only or No access field.
Once you set the Permission, click on the Save changes to create the Field Permission for the role.
Editing the Field Permission
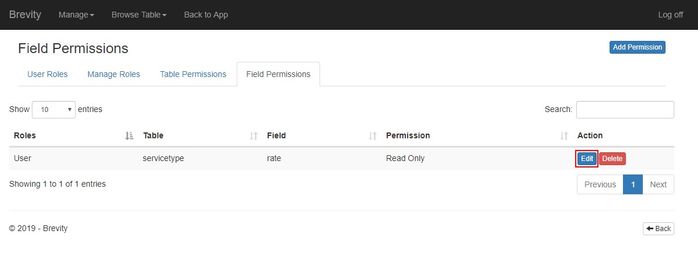
You can edit the Field Permission by clicking on the Edit button.
Fill in the Changes for the Field Permission. Once you are done editing the changes, click on the Save changes button.
Deleting the Field Permission
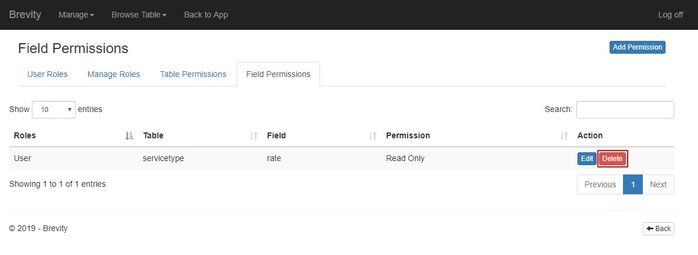
If you want to delete the Field Permission, click on the Delete button of the field permission. Take note that once you delete the field permission, you cannot retrieve it and the field will set back to normal.
Click on the Continue Button to confirm deleting the field permission
Knowing the Tables in Brevity
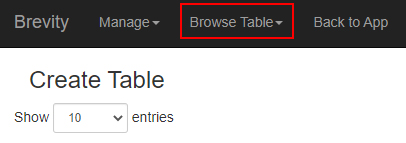
If you don't know the table that you are going to allow / reject the view for the users, You could click on the browse table on the menu of the system setup.
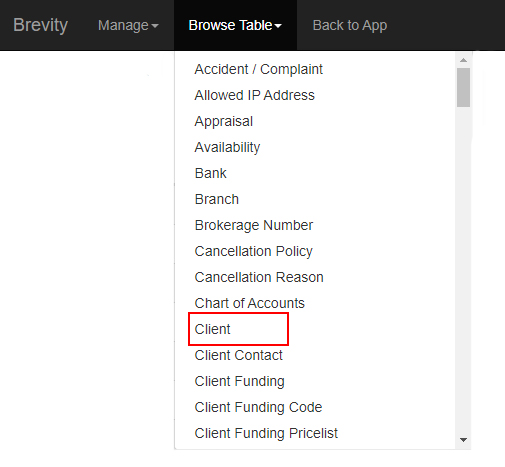
You will see the list of tables in your Brevity Software. If you click on the table, it will give you the records for that table.
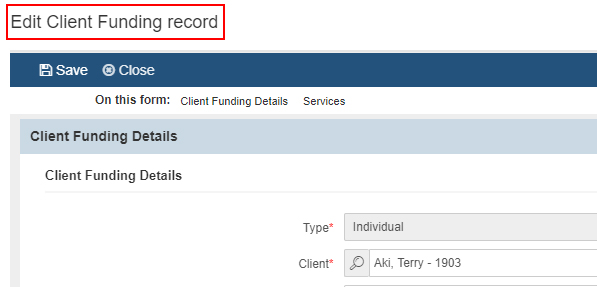
If you open a table record, you will see usually the name of the table from the upper left corner of the record. The format would be Edit/New (table name) Record.
From the example above, the table name is Client Funding. This is where you could also easily determine the name of the table that you wanted to allow / deny your user for an access to the table.
Common table name in Brevity
The list below are the common tables that are being accessed in Brevity
| Table | Table Name |
|---|---|
| Client's Record | Client |
| Employee's Record | User |
| Quotes | Lead |
| Service Schedule | serviceschedule |
| Client Funding | clientfunding |
| Invoices | invoice |
| Timesheet | timesheet |
| Pricelist | pricelist |
| Branch Setup | branch |
| Organisation | organisation |
Unlocking the menu
If you wanted to see the menu, you need to give the permission to these tables so you could see the new menu from the menu bar.
Quotes Section
| Table Name | Create | Update | Read | Delete |
|---|---|---|---|---|
| Lead | ✔ | ✔ | ✔ | |
| Lead Services | ✔ | ✔ | ✔ |
Clients
| Table Name | Create | Update | Read | Delete |
|---|---|---|---|---|
| Client | ✔ | ✔ | ✔ |
Employees
| Table Name | Create | Update | Read | Delete |
|---|---|---|---|---|
| User | ✔ | ✔ | ✔ |
Care Management
| Table Name | Create | Update | Read | Delete |
|---|---|---|---|---|
| Support Coordination | ✔ | ✔ | ✔ |
Administrator
You need to allow all the tables under the administration menu to see the menu. If you don't allow all, you will see the allowed menu from the care management.
The system setup is only available to the administrators of your Brevity to prevent unauthorized changes within the system
Special Section
There are section in Brevity that you need to allow a series of table before that user role could see the special section. If you didn't allow the table, the special section will not be seen. One example of the special section is the schedule board. Take a look at the table that you need to allow so the user role could see the special table
Schedule Board
| Table Name | Create | Update | Read | Delete |
|---|---|---|---|---|
| Branch | ✔ | |||
| Cancellation Policy | ✔ | |||
| Cancellation Reason | ✔ | |||
| Client | ✔ | ✔ | ✔ | |
| Client Contact | ✔ | ✔ | ✔ | |
| Client Goal Progress | ✔ | ✔ | ✔ | |
| Client Goal | ✔ | |||
| Service Schedule | ✔ | ✔ | ✔ | |
| Service Schedule Client | ✔ | ✔ | ✔ | |
| Service schedule Client Rate | ✔ | ✔ | ✔ | |
| Service schedule Employee | ✔ | ✔ | ✔ | |
| Service schedule Expense | ✔ | ✔ | ✔ | |
| Service Schedule Template | ✔ | ✔ | ✔ | |
| Service Schedule Template Client | ✔ | ✔ | ✔ | |
| Service Schedule Template Item | ✔ | ✔ | ✔ | |
| Service Schedule Template Item Client | ✔ | ✔ | ✔ | |
| Service Type | ✔ | ✔ | ||
| Service Type Category | ✔ | ✔ |
Checking for the user role access
If you wanted to see what the user role could see while updating the table, you could use another browser to login to another account in your Brevity. You could do this if you wanted to see the table permission that they will see when they login to their access to Brevity. You just need to refresh the page to see the changes for the user role access
Copyright © 2019 Brevity. All Rights Reserved

