Self-Serve Portal Guide
- Harvey Mediran
- Stewart Neale
- Brevity Care Software
Introduction
The Brevity portal is a specialised app for therapists and support coordinators to manage care and records sessions for their clients. Portal users can see a list of clients assigned to them by the Admin and can see client profile information, funding info, documents and care notes all in one place.
They can record session details as billable or non-billable against a budget item from the client profile screen. This will record a timesheet and care note at the same time. The system will not allow recording of billable times outside funded periods or if budget has been fully utilised.
Portal users can schedule planned shifts for their clients and can then add a timesheet/record against it when it is complete, all of these are done in an interactive calendar in the portal, so that they get a better view of when the shifts are scheduled and for which clients, they can change the calendar view to week, fortnight or month to display the shifts and their details.
These are the topics on this page:
Access to the Portal
Only users with role User only cannot access the portal, so to assign the role to a user:
- From Brevity care website, go to the users listing by clicking Employees and then click Employees
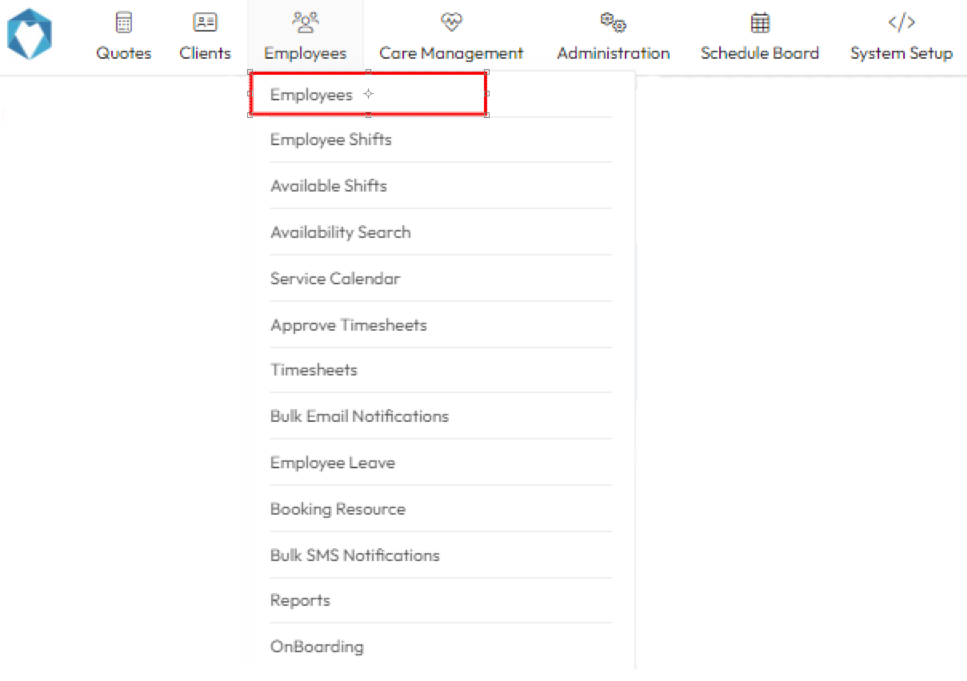
- Then open the user record by double-clicking it

- Click manage login button from the user menu as highlighted in the below image.

- Update / create the username and password and select role other than Self-Service Portal and then click save, this user should now be able to access the portal.
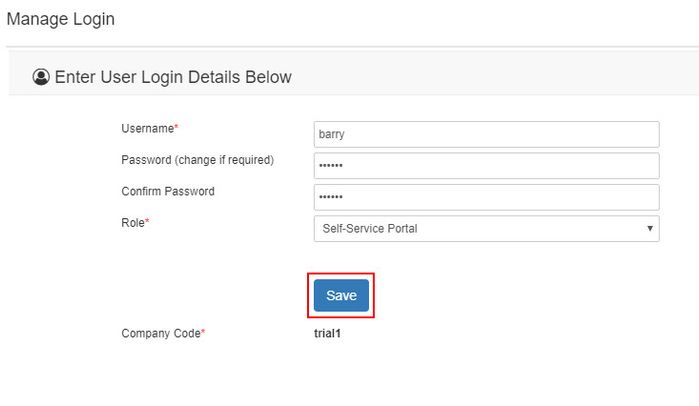
If the user has a role of Admin, Super User, User or any role that could access your main Brevity system, they could use the same login details to access the portal
Assign clients to the Support workers
- From Brevity care website, go to the user listing by clicking employees then click employees
- Open the user record by double-clicking it.
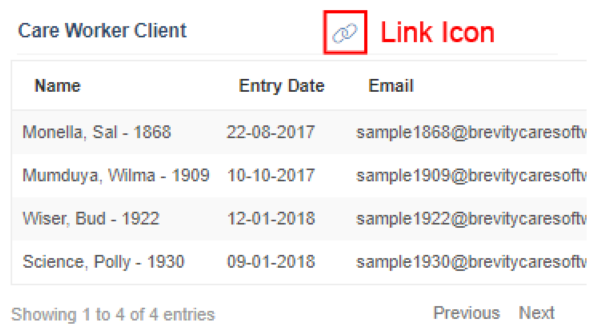
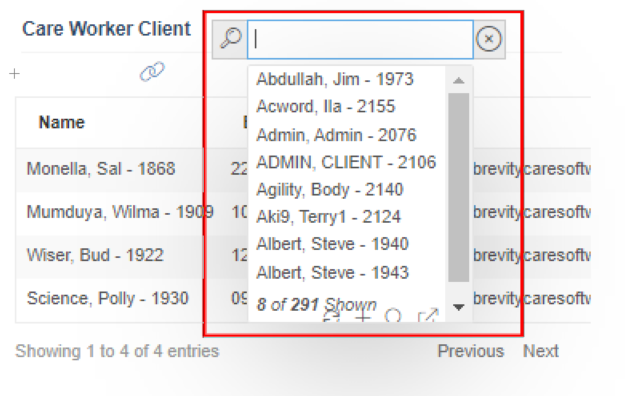
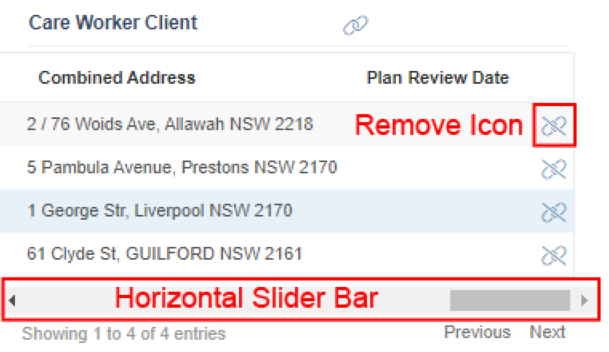
- There is a section that says Care worker clients, it lists all the clients that are associated with this support worker.
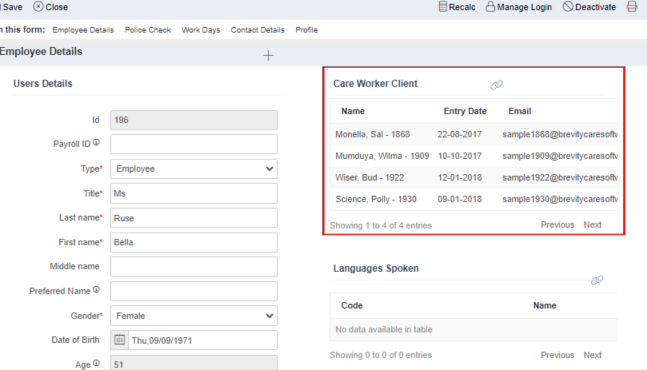
- To add a new client to the list, click on the link icon as highlighted in the image below
- An autocomplete box appears from which client can be searched and selected and it gets added to the list.
- To remove client (disassociate with the support workers), move the horizontal slide bar to the right and click the remove icon as highlighted below.
Portal Login
Please note that the Brevity Portal is accessed via a separate url: https://portal.brevity.com.au/ . Portal users should use this Url along with the login details you have setup for them, to login.
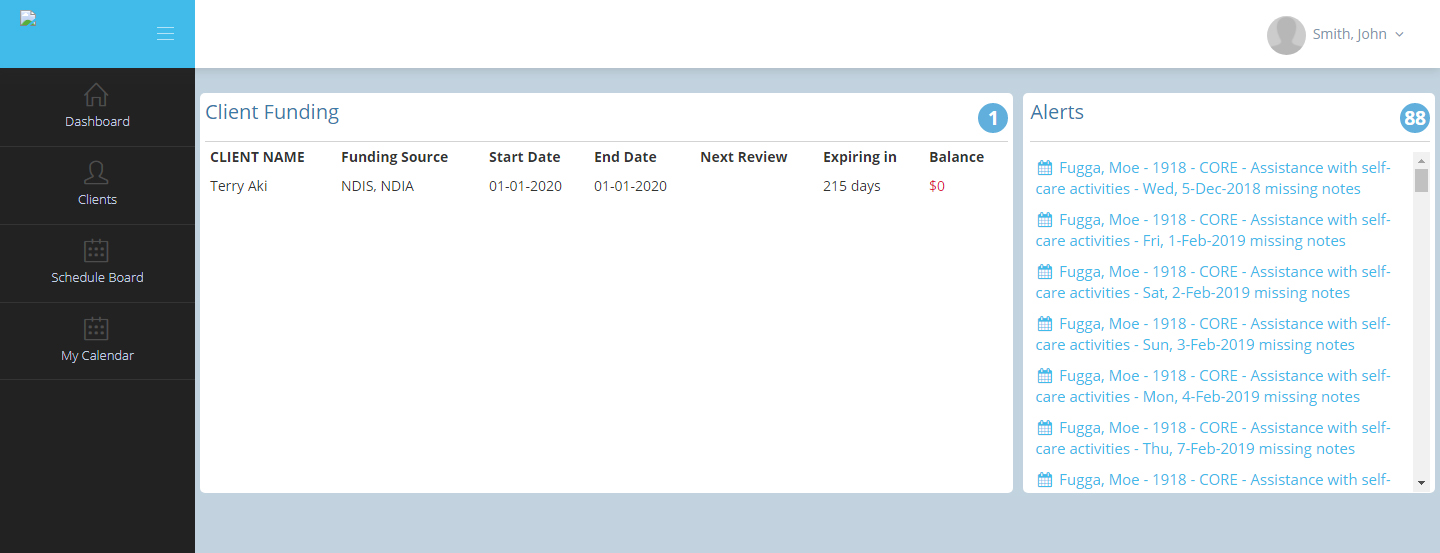
Portal Dashboard
Once logged in the system with correct credentials and company code, the user can see an overview of the data processed for them that includes funding and their details of the clients assigned to them and various alerts generated by the system for them.
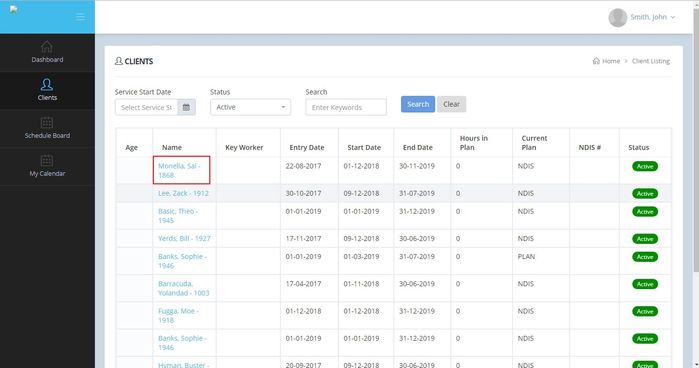
Clients
This screen lists all the clients assigned to the logged in user. The list can be filtered by service start date, client status (active/inactive) and a general search function.
Clicking on the client name opens a new screen with showing profile information, funding information, documents and care notes for the clicked client.
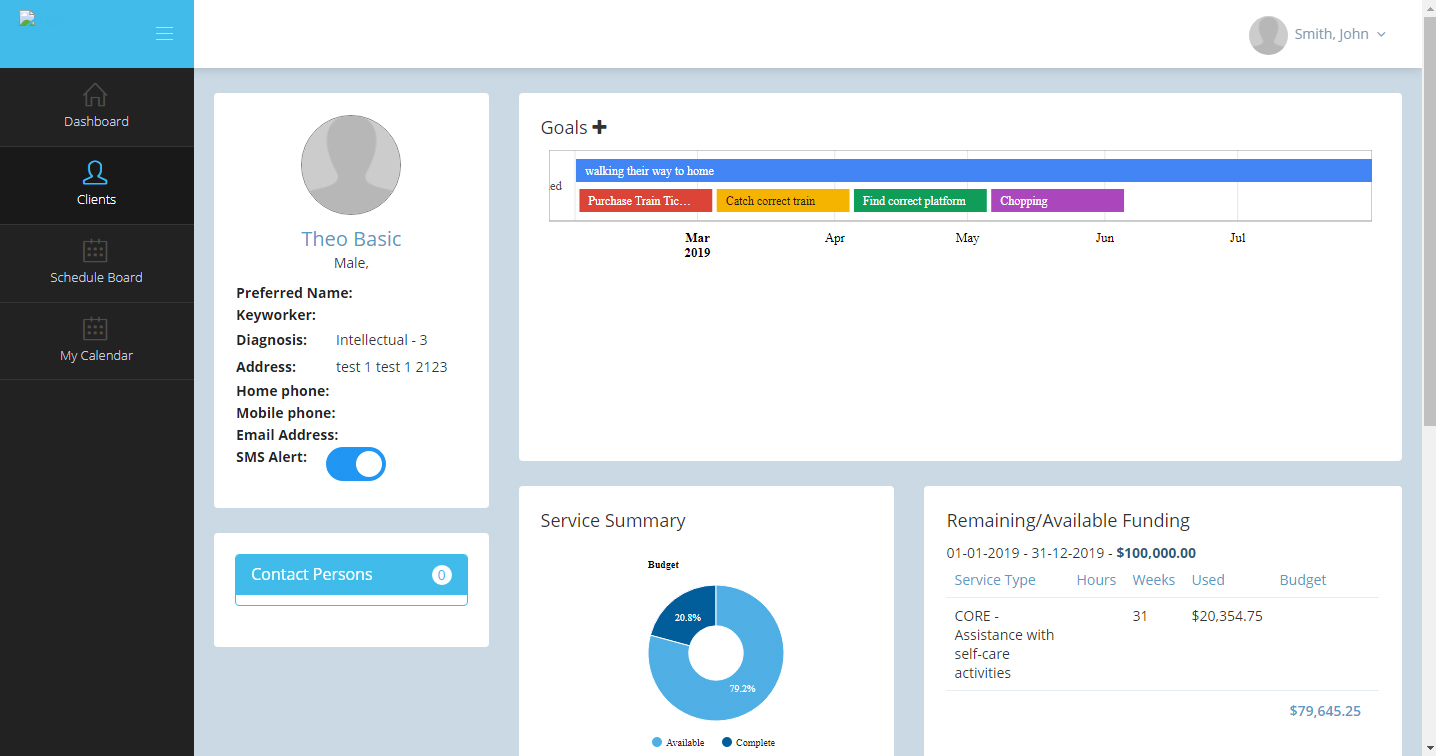
Client details
This screen shows profile information of the client, their contact persons, other therapy team members engaged with them (the client), their goals and Plan Reviews done in the chart, Service summary chart showing the number of services and their cost with budget utilized over a span of one year, their funding details with services. This screen also lists the documents and clinical notes uploaded during previous therapy sessions. Services that are completed are also listed that can be updated until those are approved by the admin. Support workers can also record a new session with a timesheet for the client if they (clients) are under funding cover.
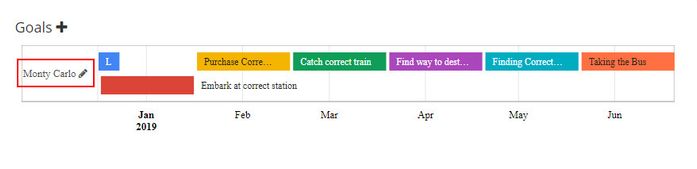
Goals and Plan review
On the client details screen, the user can see all the goals assigned with their due dates and progress along with Plan reviews conducted for them (the client).
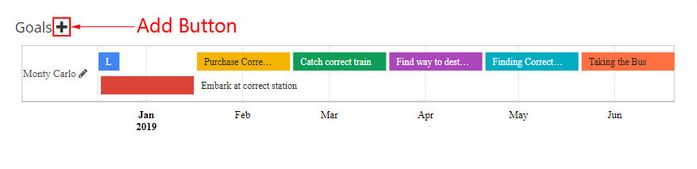
Support workers can add new goals for the client by clicking the + icon besides Goals title.
Create and edit goals
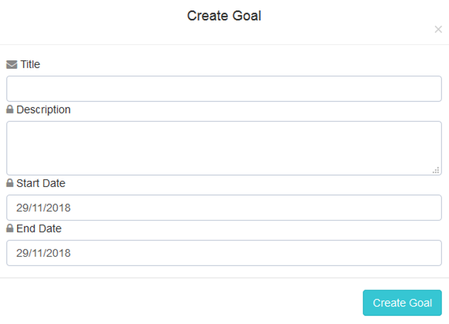
A goal has a title, description, start and an end date. To edit a goal and its information, click on the client's name from the goal chart.
You can edit the Goal on the update goal pop up. After editing the goal, click on the Update Goal button (on the lower right side of the pop-up) to update the Goal.
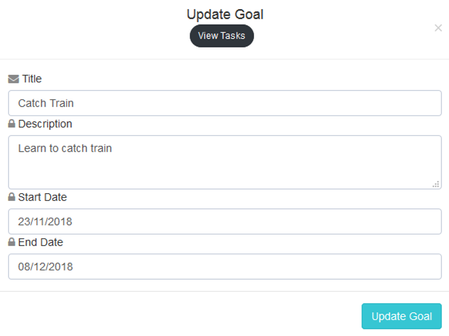
To view goal tasks, click View tasks (below popup title) on goal edit screen (above image).
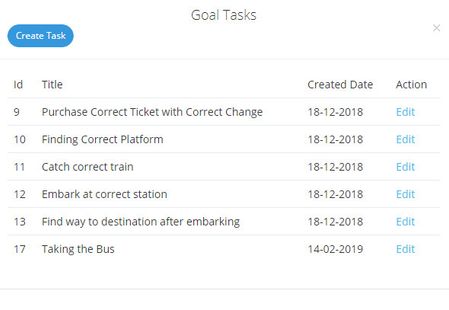
Goal tasks can be edited or new tasks can be created from the Goal tasks popup screen (above image).
Therapy Team, Clinical and other attachments
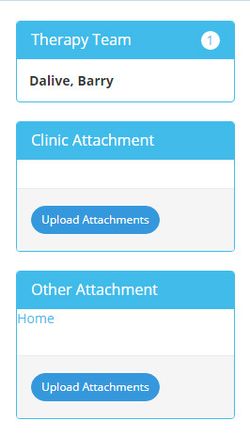
You can check the list of other Therapist assigned to the Client from the Therapy Team Section. All the documents, images etc. uploaded for the client during their therapy sessions (by all Support workers) appears under Clinic Attachment while general notes and documents related to the client are uploaded and appears under other attachments.
Record session
To record a session for the client, click on  button.
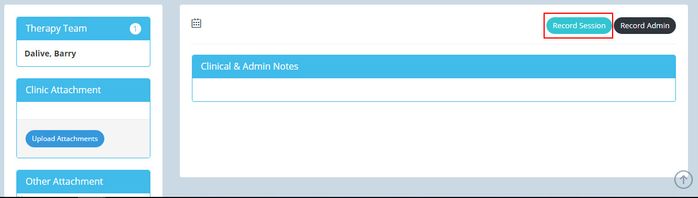
A popup appears from here a new shift and a timesheet can be added for the client. Select the consult date when therapy session was provided for the client, select service that is active (funded service) for the client, adjust the consul, admin and travel time on the time sliders and verify the total time. Client note can be updated that gets attached to their record and then click the Add record button to add a new shift and a time sheet for the client. The newly added record then appears under the Clinical and admin notes listing which shows all the completed therapy sessions for the client, which can be updated until the session/record is approved by the admin.
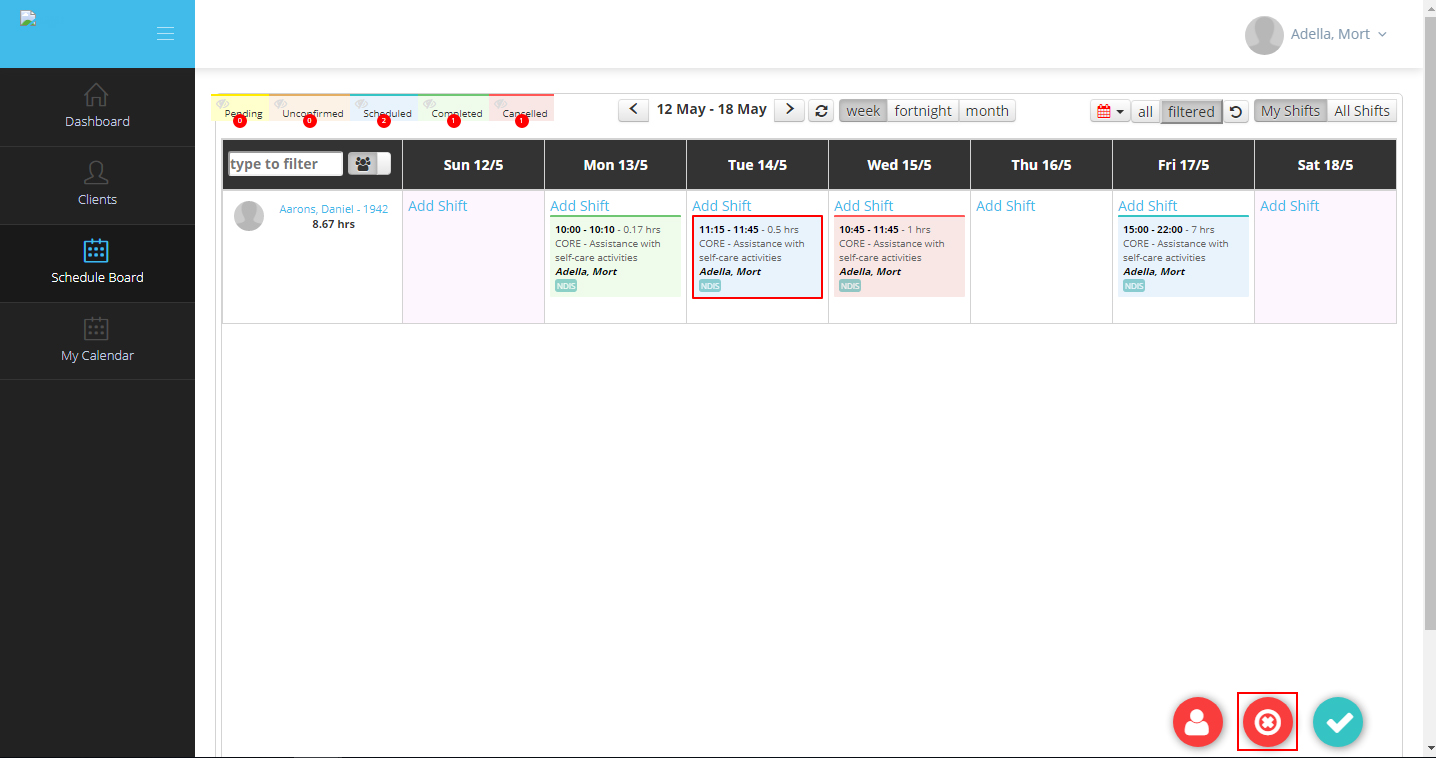
Schedule board
A calendar view to show all the shifts scheduled, completed, cancelled for all the clients displayed for the logged in Support workers. They can schedule a new shift for the client, can add record/timesheet against the shift and/or can cancel the shift.
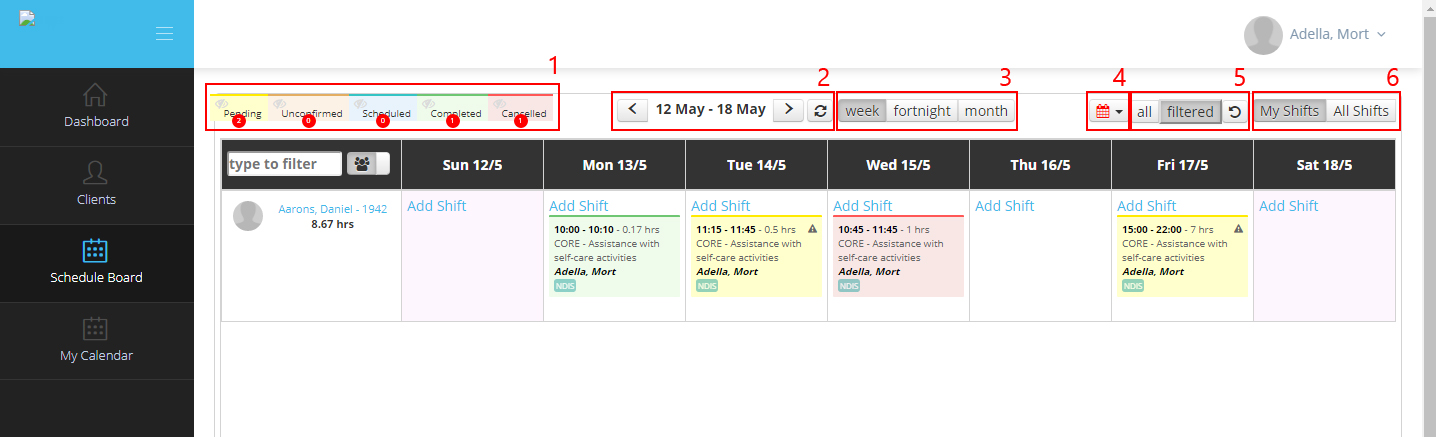
The header contains:
- Legend for the shift: It displays the shift status with the number indicating their count.
- Calendar dates navigation: from and to date can be selected/navigated and the shifts that falls/recorded/scheduled during that period are displayed.
- Week/Fortnight/Month view: as the name suggests, this shows the calendar view in displaying in week/fortnight/month format.
- Import Calendar: You can import the calendar from different calendar like Google Calendar, Outlook, Mac OS X Calendar.
- All/Filtered: the clients can be filtered by text search provided on first cell of the calendar header and then the calendar displays only the matched clients in it, to toggle between filtered view and all clients, click filtered and all button respectively.
- Shifts Selection: You can display the shifts that is assigned to the therapist or you can display all the shifts of the clients.
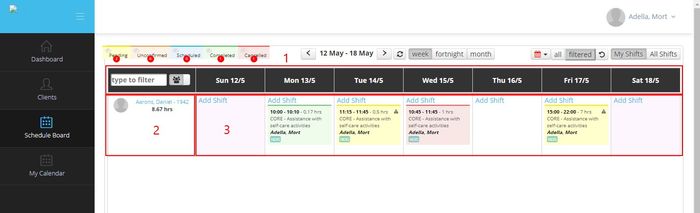
The calendar contains:
- Header row: filter cell and the dates
- First column: lists all the clients assigned to the logged in Therapist
- Body: shows all the shifts scheduled, completed, cancelled for the respective clients.
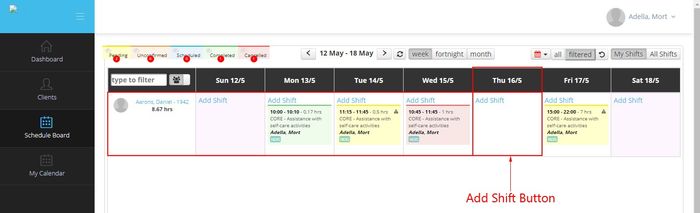
To schedule a new shift for a client for a particular date, navigate to a particular date and click Add Shift link in the cell (client row and date column intersecting).
Add shift
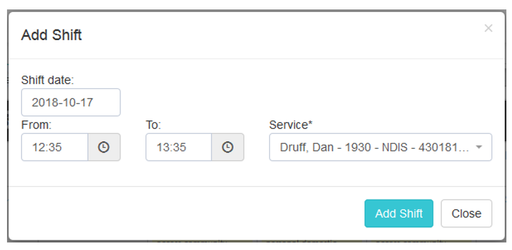
A popup appears where shift date and time from and to can be entered, if the client is funded during the selected period, then the shift gets added.
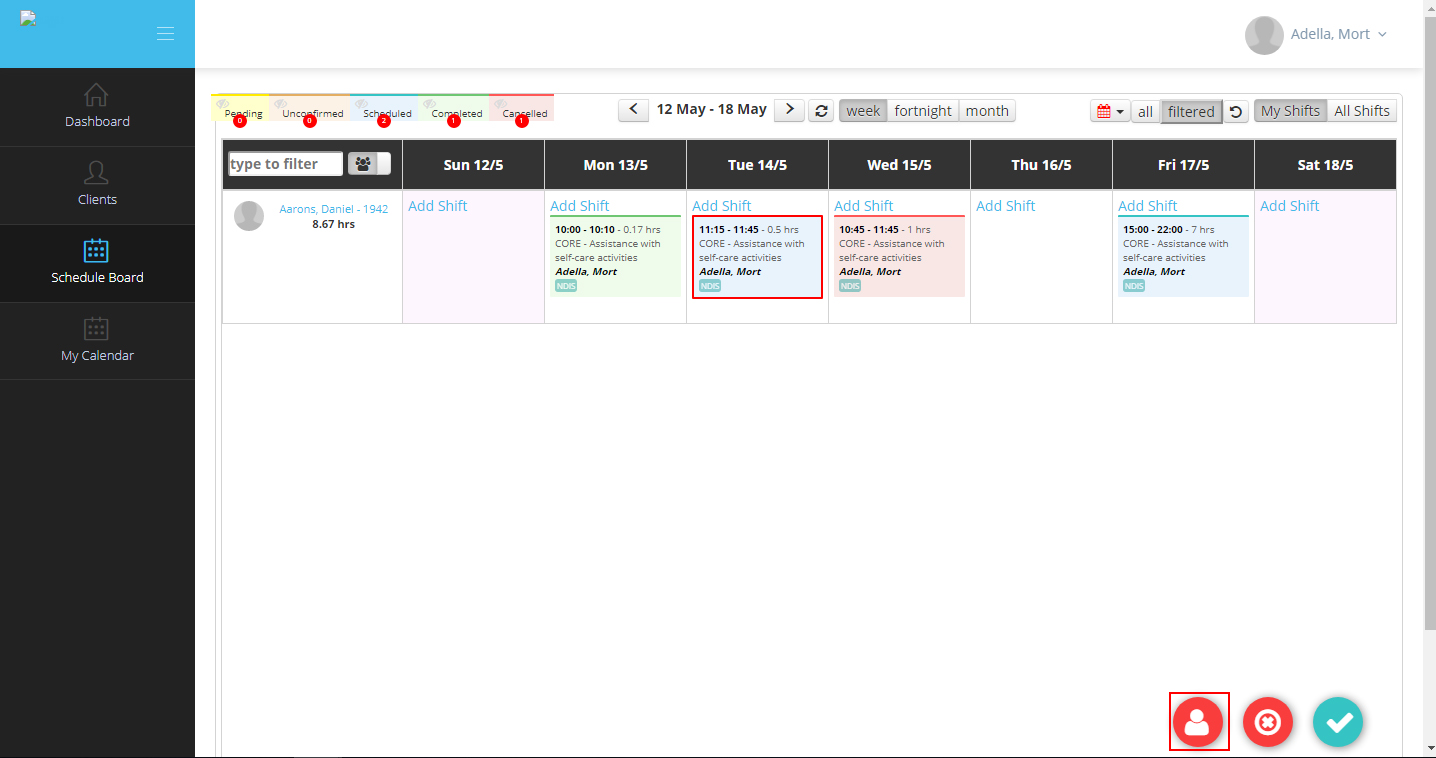
Change Employee
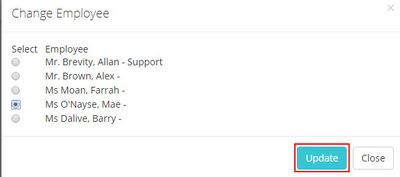
The self-serve workers can assign a shift assigned to them by clicking on the shift that they want to assign to other self-serve worker and then clicking on the change employee button.
A pop up will appear where you can select another self-serve worker that is assigned to the client. The list will show all the self-serve worker that is assigned to the client. Select the employee that needs to be assigned to the client and then click on the update button to assign the shift to the new self-serve worker.
Approving Shift
Timesheet (after completing the session) can be added against the shift. Click the shift that needs to be completed, 3 new buttons appear at the bottom of the screen.

A popup appears to record the session details which is similar to the one that is in the client details screen.
In general, all shifts can be updated until they are completed and marked as approved by the admin.
Cancel shift
A shift that is not already completed can be cancelled. Click on the shift to cancel, a cancel button appears at the bottom of the screen. Click on the Cancel Shift button to cancel the shift.
Clicking the cancel button a confirmation screen appears that has the following options:
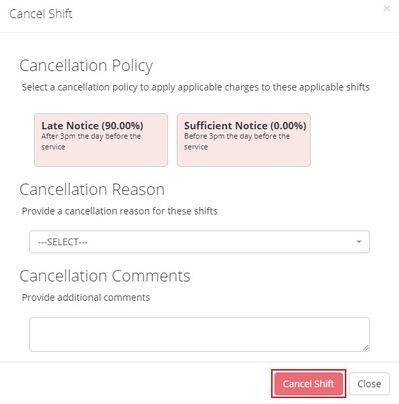
- Late Notice: Even if the shift has been cancelled, the shift will still have a charge for a late notice.
- Sufficient Notice: The shift will be cancelled and there will be no charge.
- Cancellation Reason: You can select several reason for the cancellation of the shift from this dropdown.
- Cancellation Comments: You can add additional comments for the cancellation of the shift.
Click on the cancel shift button to cancel the shift for the client
Copyright © 2019 Brevity. All Rights Reserved