Schedule Board and managing schedules
- Former user (Deleted)
- Brevity Care Software
- Harvey Mediran
- Anne Pascual (Deactivated)
The Schedule board allows you to view and manage all service schedules, by client and by staff.
These are the topics on this page:
Changing the Schedule Board view
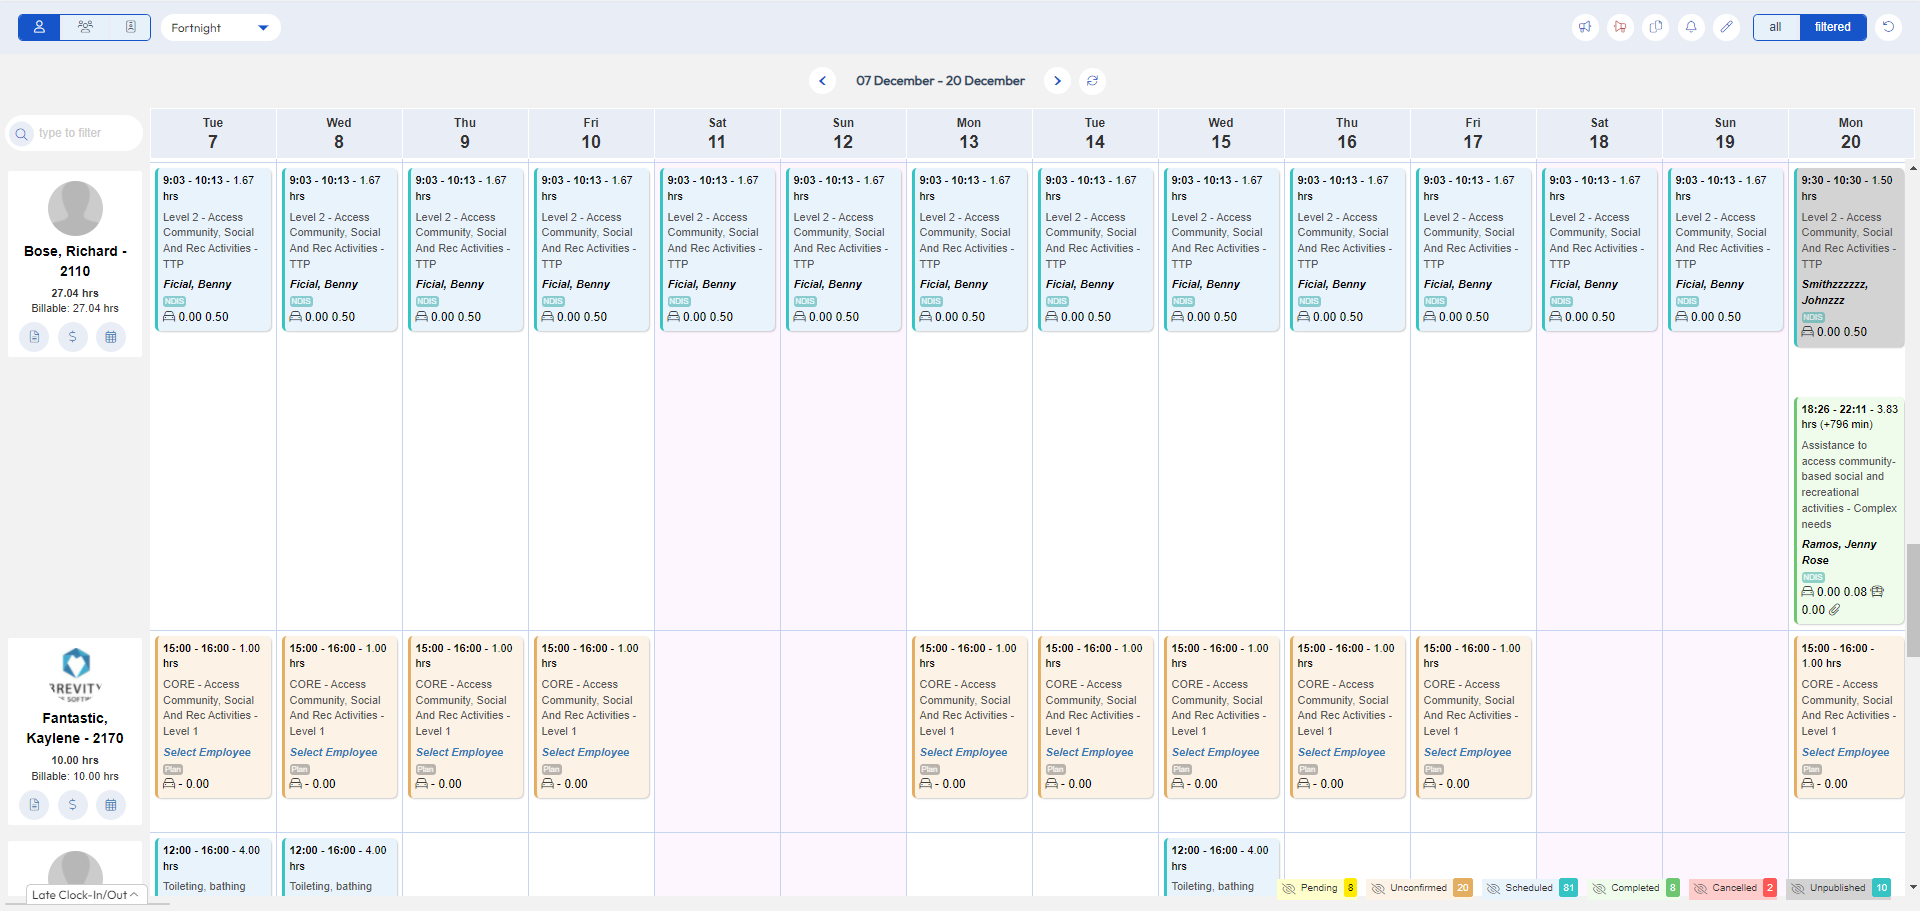
There are several views available on the Schedule Board to allow to quickly view and amend schedules. The default view on the schedule board is by client but you can also change to view by staff or groups using the toggle in the top left.
There is also the option to show a filtered view using the toggle in the top right, which will only display clients/staff that have a schedule for the selected period. This section also includes a reset button that will clear all filters and return you to the current week.
There is also the option to view the schedule by Day, Week, Fortnight or Month. You can also click on the date range to select the start date of the view. The Week, Fortnight or Month views show the clients/staff in the left most column with each day of the view represented as a separate column.

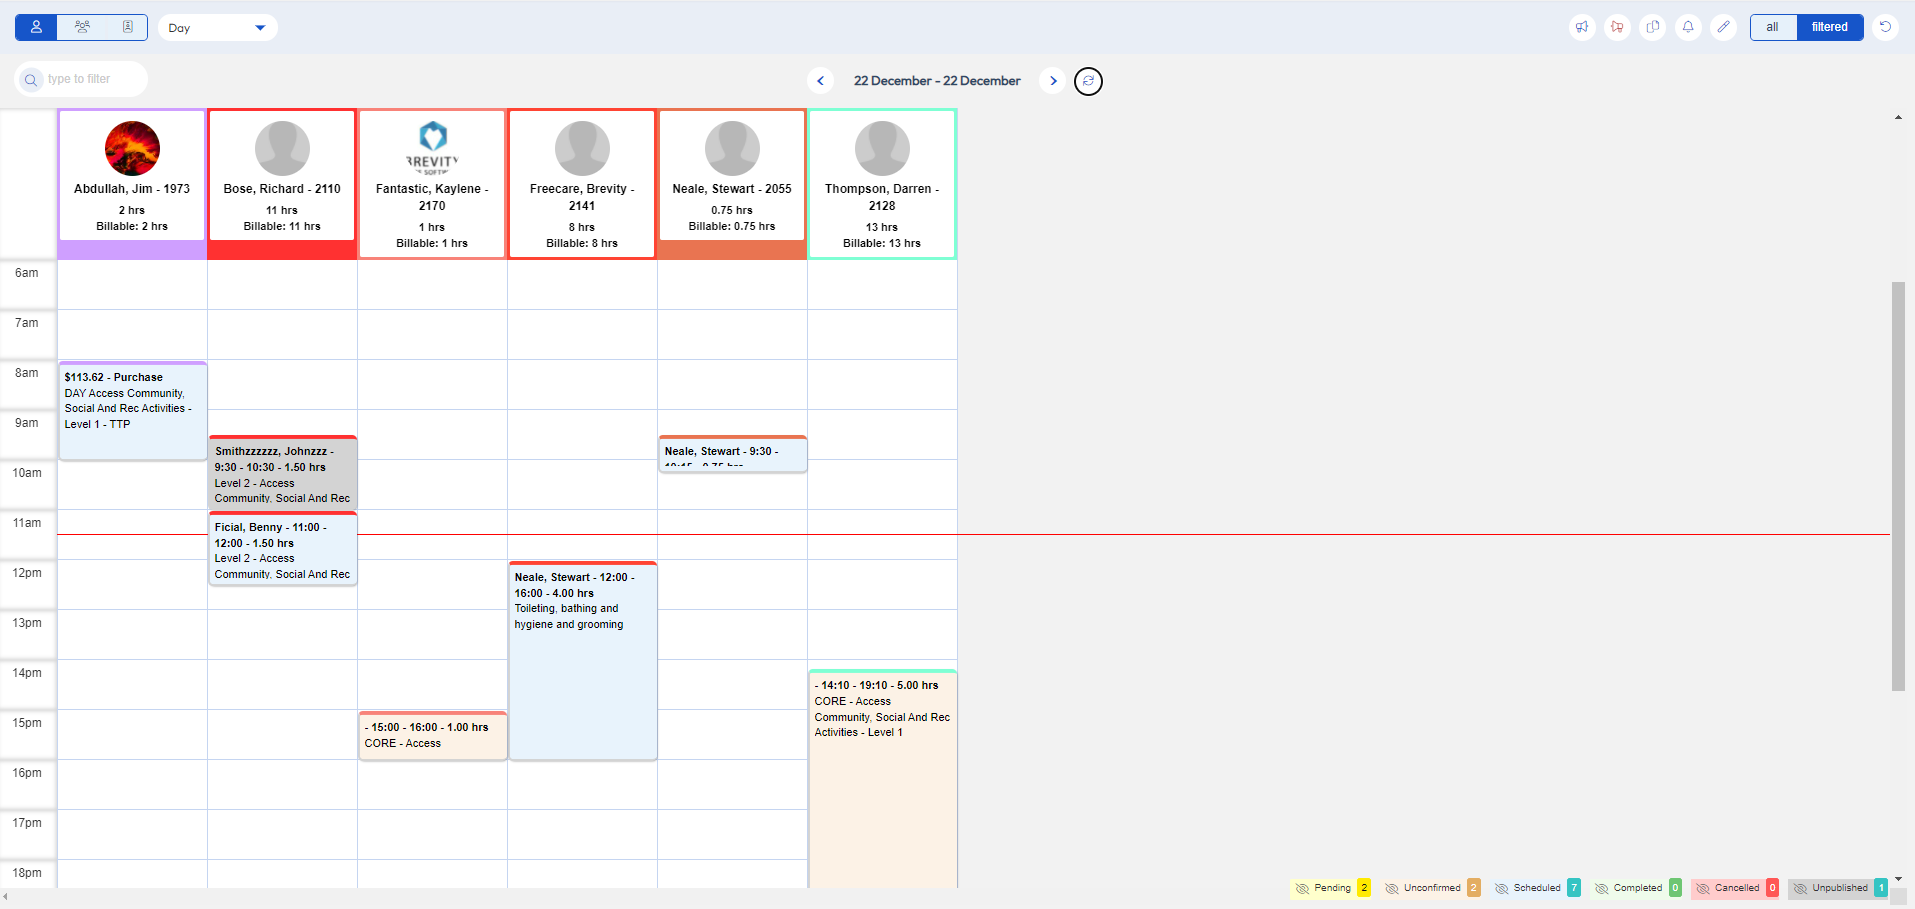
The day view is a special view that shows the clients/staff within separate columns, with the timeline of the selected day represented within the view.
Changing the shift's date
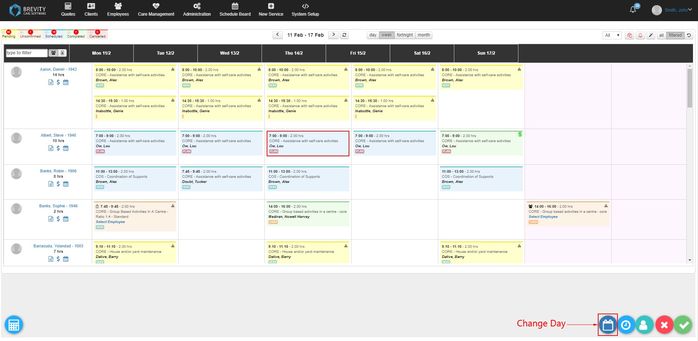
In the Schedule Board, select the shift that needs to be rescheduled and then click on "Change Day" located on the bottom right corner of the window.
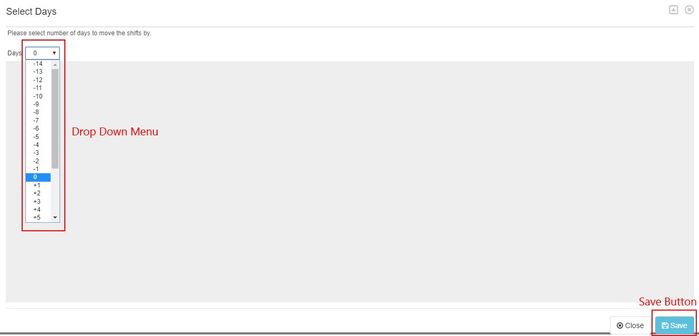
Click on the drop-down menu to select the date. Then click save.
Changing a shift's start and end time
In the Schedule Board, select the shifts that's going to edited and then select the "Change Shift start or End time Button" in the bottom right corner of the window,

The shift start and end time window will come-up, change the start time or end time appropriately and then select the "Save Button" located on the bottom right corner of the window to save the changes.
.jpg?version=1&modificationDate=1532309991901&cacheVersion=1&api=v2&width=700&height=496)
Changing a worker to a selected schedule
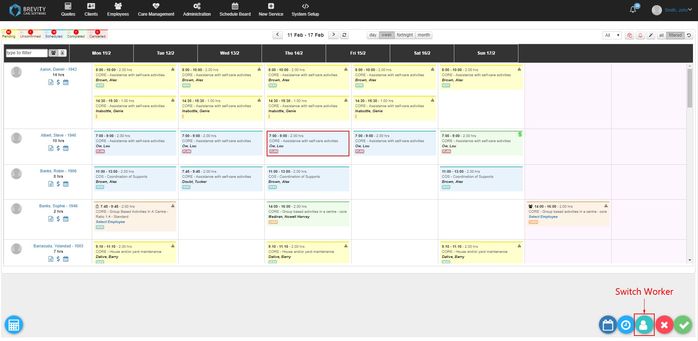
Select the schedule to be edited and then select the "Switch worker Button",
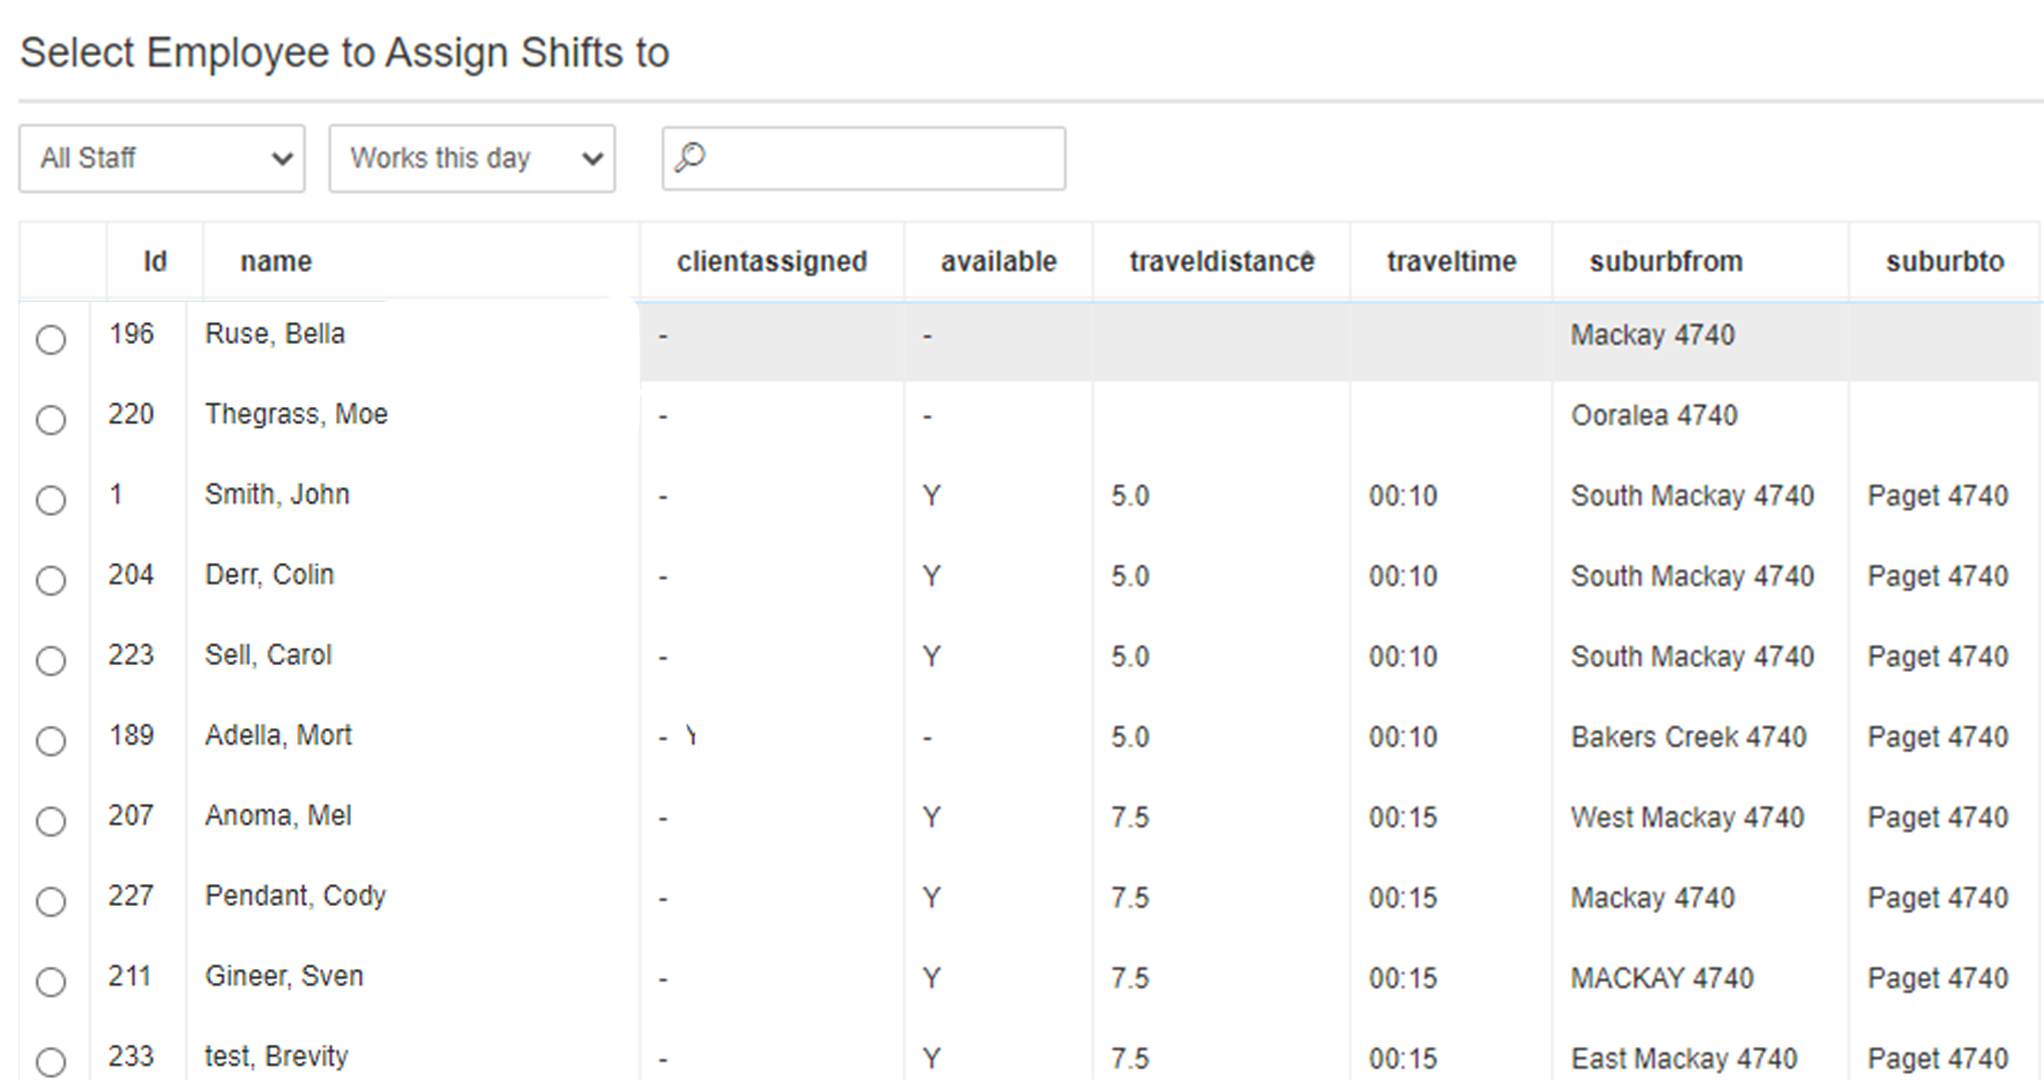
To select the available employee, you can use the search field to search for matching employee that is needed for the shift. Click the search button to show the result. Employee's Shift window will show if the employee has a shift on that time and it will also highlight the shift for the client. Click on the employee's name and click the select button to change the employee.
.jpg?version=2&modificationDate=1543543760049&cacheVersion=1&api=v2&width=700&height=330)
You will also see the distance of the support worker's address to the client's home. Brevity will automatically calculate the distance and will prioritize the employee that is near to the client's address that you specify from their profile.
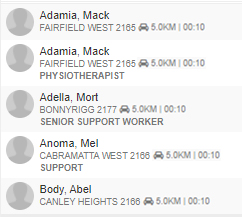
You will also see distance of the employee to the client when you are selecting the employee for multiple shifts.
Changing the Assigned Employee for multiple Shifts
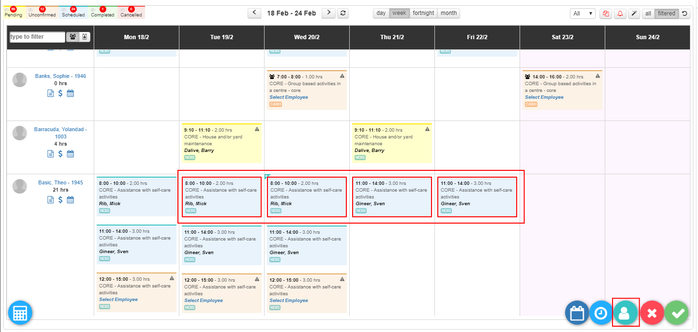
You can select different shifts from the schedule board and assign another employee to the shifts. Select the shifts you want to change the employee and then click on switch worker button to change the employee to the shifts.
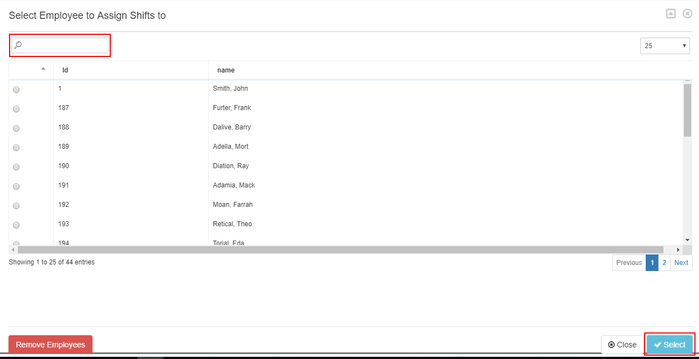
The change employee window will pop up. You can use the search box to search for the employee. Click on the name of the employee then click on the select button to change the employee for the shifts.
Removing the Employee for Multiple Shifts
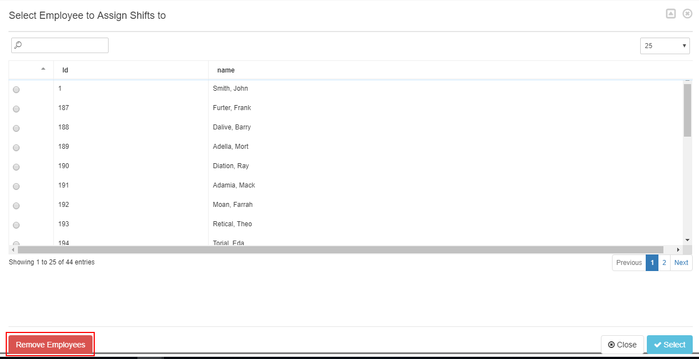
You can remove the Employee's Assigned to Multiple Shifts. Select the Shifts you want to remove the employee assigned to it then click on the Switch Worker Button.
It will open the change employee pop up window. Click on the remove employees button to remove the employee from the shift.
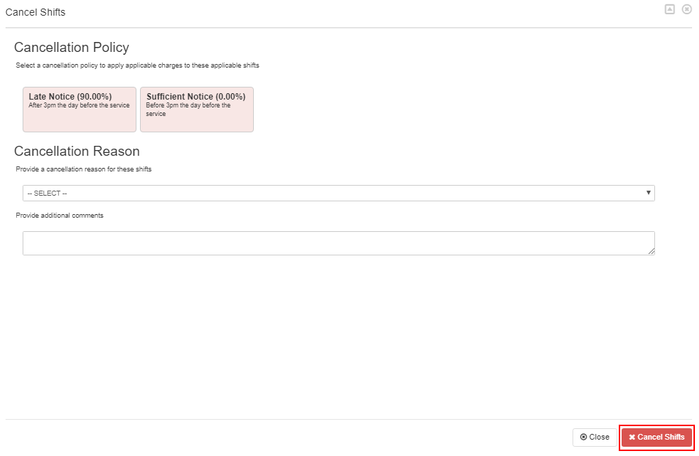
Cancel Selected Shifts
If the client cancel the service schedule, you can cancel shift(s) from the schedule board. You can cancel the shift(s) by clicking on the shifts that needs to be cancelled and then clicking on the Cancel Selected Shifts button.

You can include the cancellation policy and the cancellation reason for the shift. You can select several cancellation reason by clicking on the cancellation dropdown. You can also provide additional comments by typing the comments from the provide additional comments box. Once you updated the cancellation policy and cancellation reason, click on the cancel shifts button to cancel the shifts.
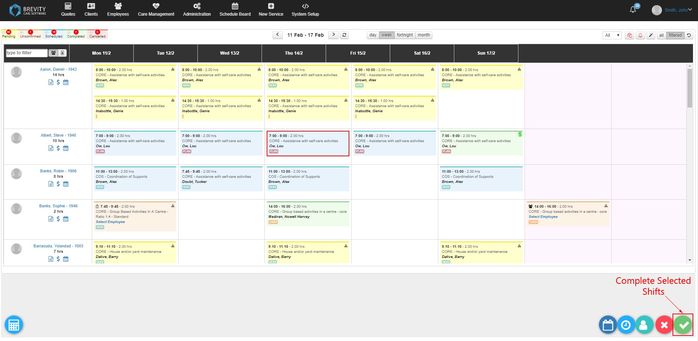
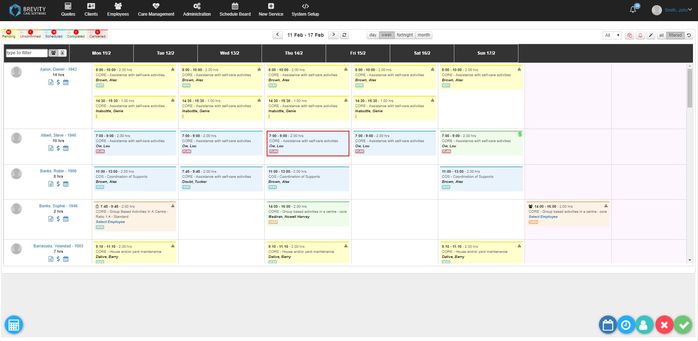
Completing Shifts
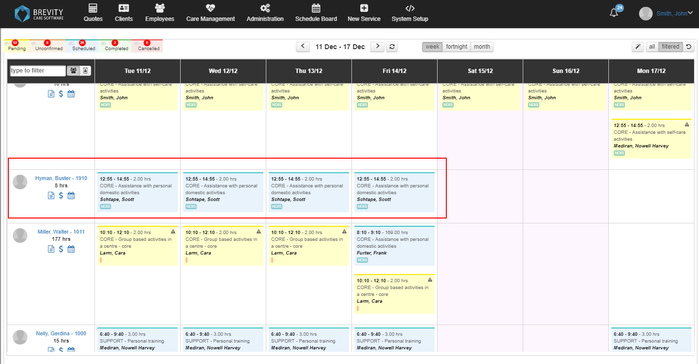
In the Schedule Board, select all the shifts that have been completed and then select the "Complete Selected Shifts" Button on the bottom right corner of the window. Shifts selected will be highlighted with a red box once selected.
Duplicating a Shift
Brevity allows you to duplicate shift and schedule it to other day(s) using the schedule board. To duplicate a shift, click on schedule board from the menu

Then double-click the shift that you want to duplicate
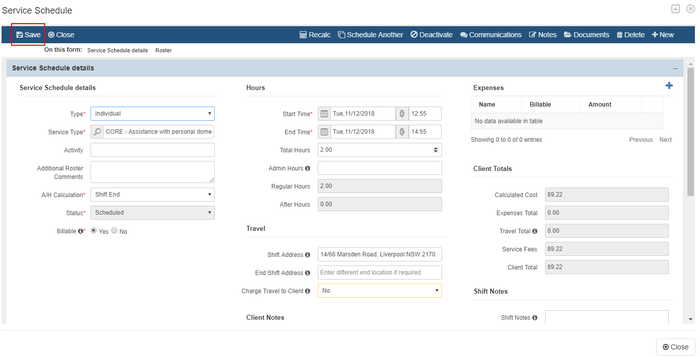
It will show the details of the shift. Click on "schedule another" button to duplicate the shift
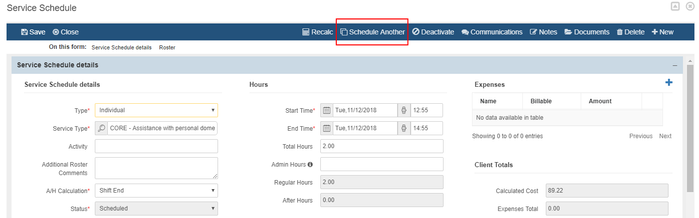
Clone Service page will open. The start date is the first day you want to copy the service schedule. The end date is the last day you want to copy the service schedule. You can set the interval for the service schedule by clicking on the drop-down menu. If you select weekly, you can set the dates when the service schedule will be copied.
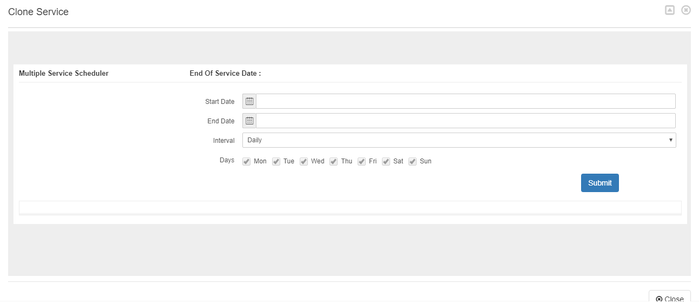
Once you are done setting the dates of the schedule, click submit. You will return to service schedule page. Click save to save the schedule, then click close to return to Schedule board.
On schedule board, click on the refresh button to update the Schedule board. The clone shifts will now appear on the schedule board
Adding Shifts
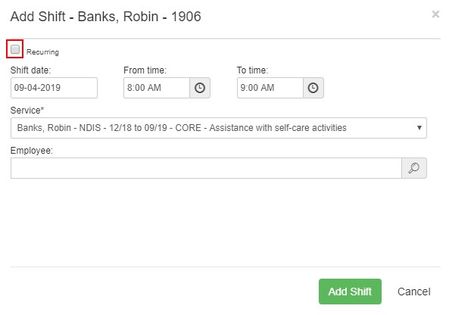
You can now quickly add one off or recurring shifts for clients directly from the Schedule Board. If you hover over any of the days on the calendar, you will notice a new + icon in the top left...

Clicking on this icon lets you quickly create new shifts directly from the board.
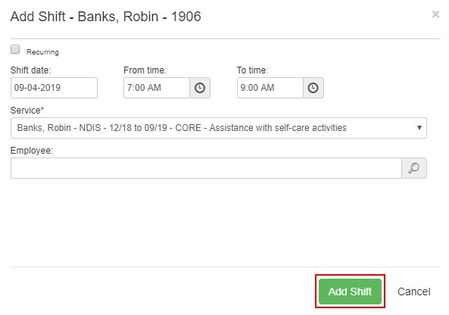
- Shift Date: This will be the date of the service schedule
- From time and To time: This will be time of the service schedule
- Service: This will be the Services that are linked to the client's funding.
- Employee: You can assign an employee to the shift. If there is no employee that should be assign to the service schedule, you can leave it blank.
Click on the Add Shift button to add the service schedule for the client.
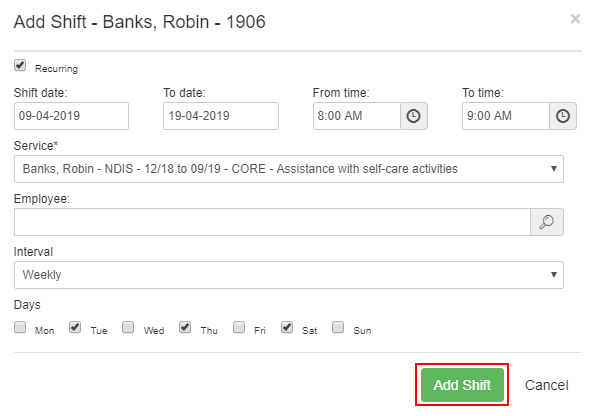
Recurring Shift
If you want to create a recurring shifts, Click on the + button from the upper left portion of the shift box.

Publishing Available Shifts
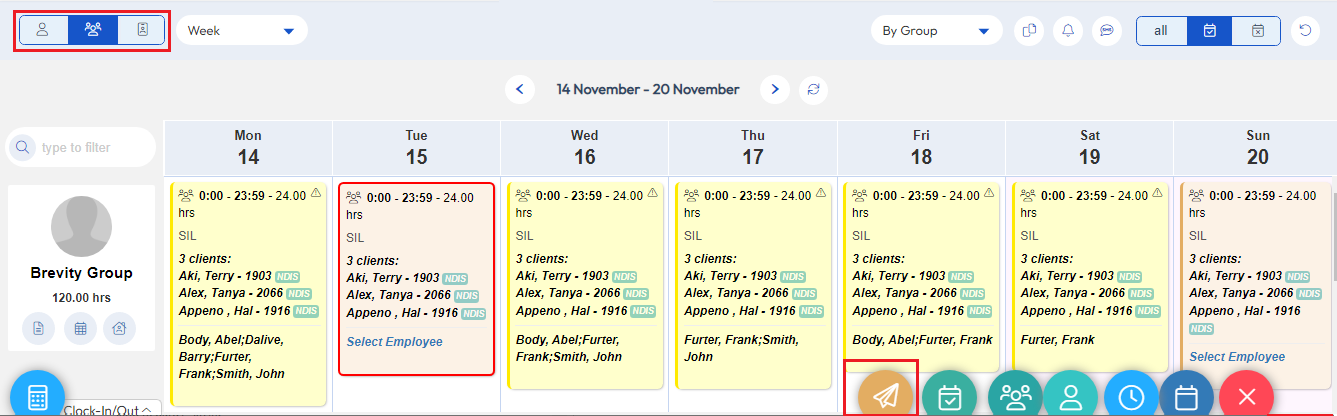
You can now also quickly publish available shifts for Support Workers to pick up via the mobile app. This done via the orange publish button which is shown when available shifts are selected on the board. Shifts can be published for pick-up by only client assigned workers, workers that have previously worked with the client, or all workers for the branch.
The system will recommend staff based on their availability, if they are assigned to the client or have worked with the client previously, proximity to the client, and have the required qualifications. You also have the option to enable/disable the push notification sent to staff to notify them of the published shift.

An icon is added to shifts to identify when they have been published. These shifts can be selected and the published button clicked to change who the shift is offered to at any time.
Staff that the shifts are published out to are able to log in via their mobile app, navigate to the Available tab, and pick up the shift. This is on a first-come-first-serve basis. The person that has published the shift will be notified once the shift has been picked-up via email.
Publishing Available Shifts (Groups View)
You can now also quickly publish part shifts for Support Workers to pick up via the mobile app for group shifts. This is especially useful for house roster such as SIL rostering. This is only available in the group view and when one shift is selected. This is done also via the orange publish button which is shown when available or scheduled shifts are selected on the board.
Using the + / - options below the Shift Time dropdown, you can create the time blocks to offer to staff. Just as with the standard publish option, the system will recommend staff based on their availability, if they are assigned to the client or have worked with the client previously, proximity to the client, and have the required qualifications. You also have the option to enable/disable the push notification sent to staff to notify them of the published shift.

An icon is added to shifts to identify when they have been published. These shifts can be selected and the published button clicked to change who the shift is offered to at any time.
Staff that the shifts are published out to are able to log in via their mobile app, navigate to the Available tab, and pick up the shift. This is on a first-come-first-serve basis. The person that has published the shift will be notified once the shift has been picked-up via email.
Copy Shifts
A new Copy Services function was added to copy sets of shifts for a client from one period to another. This is convenient if have complex rosters (e.g. 3 week or 4 week repeating) and would like to easily create a recurring roster based on these schedules.

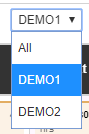
Branch Filter
You are now able to filter shifts by branch, if you have more than one branch or area of your business. This allows you to conveniently view only clients and shifts relating to a branch or area the business...
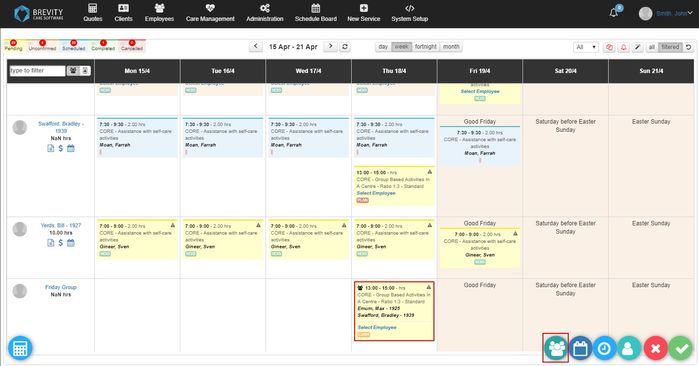
Adding / Removing Clients to the Group Service Schedule
You can manage the clients that will be included in the group service schedule from the Schedule Board. If you want to add a client that will be included in the Group service schedule, click on the group service schedule from the schedule board and then click on select clients button.
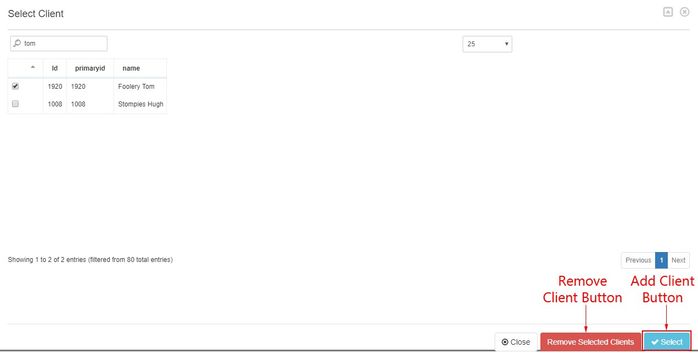
You can search for the client's name by typing their name on the search box. Click on the check box of the client that you want to add to select the client.

If you want to add the client to the group service schedule, click on the Select Button. If you want to remove the client from the group service schedule, click on the remove selected clients button.
Changing Service type of Multiple Service Schedule
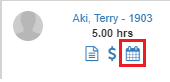
You can change the service type of multiple service schedule from the schedule board. You can do this by clicking on the calendar icon under the client's name.
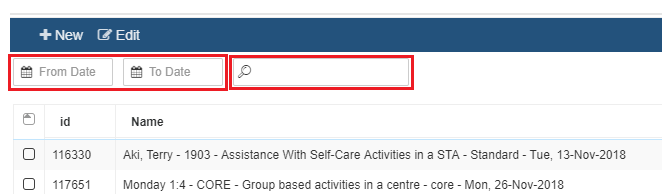
It will open the list of client's service schedule. You can use the date box if you want to show the shifts for the selected date. You can also use the search box to search for the keyword of the service type (this could be the time, date, service type).
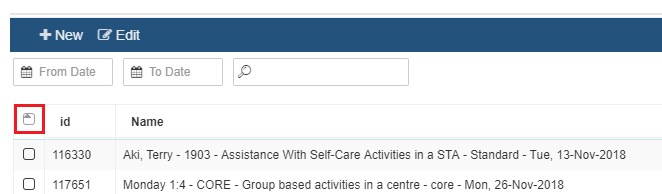
Once the service schedule that you want to change are displayed, you can click on the checkbox besides the ID column to select all the shifts. You can use the CTRL or shift key to select different shifts from the list (see Selecting Multiple Record from the List on how to select different records).
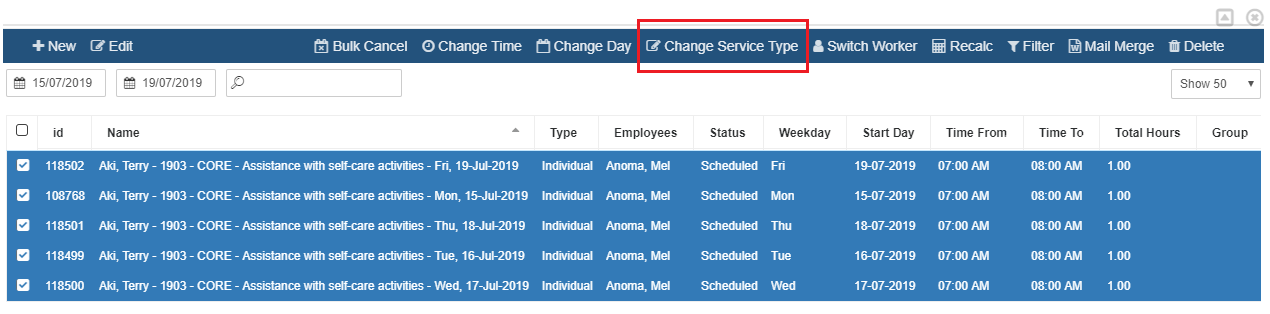
It will highlight the shifts that you selected on the table. Click on the change service type button to change the service type of the selected shifts
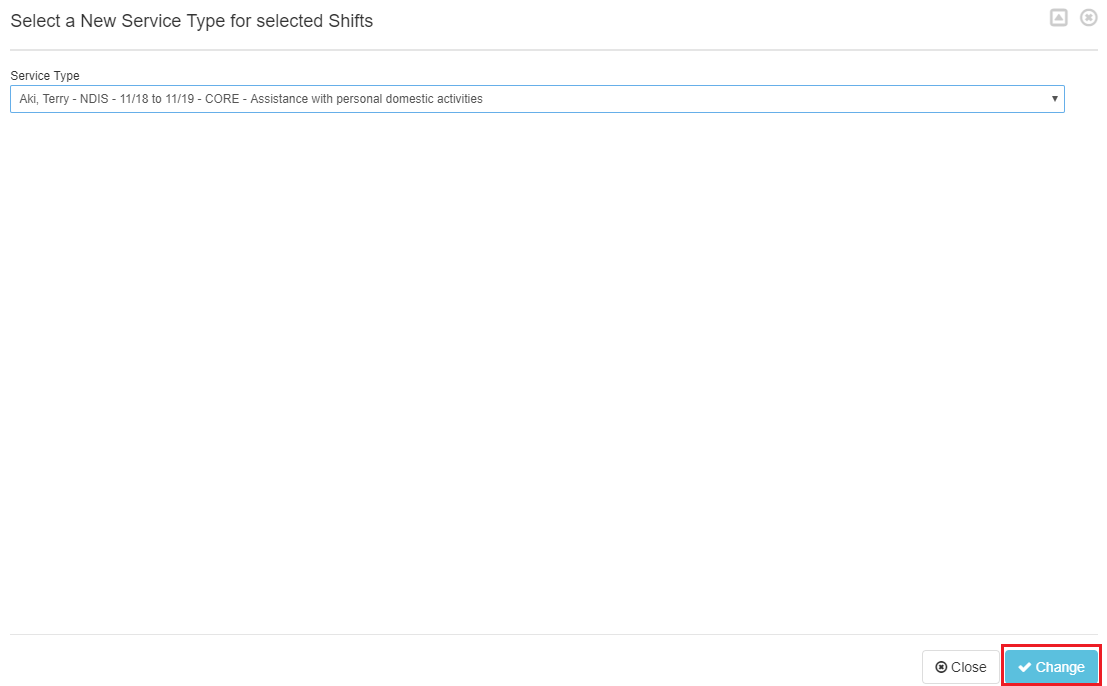
The select service type window will appear. You can click on the drop down to show the available service type that you can use to change the service type of the service schedule.

The drop down will show all the service types that are linked to the client's funding. If you don't see the service type that you want to use, you need to link a service type to the client's funding (see Client Funding information on how to link a service type to their funding).

Select the Service type that you want to use and then click change button.
Click on the OK Button to confirm changing the service type
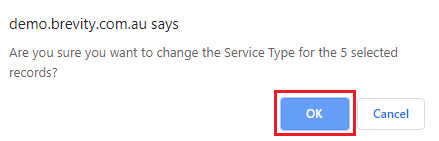
The service type will be changed for the service schedules that you selected.
Service type cannot be changed on shifts that has completed and cancelled status.You need to unlock the shifts first before you can change the service type.
Copyright © 2019 Brevity. All Rights Reserved