Modifying the Client's Claim
If there are changes that needs to be done to a claim for the Client's Service schedule, you can follow these guide in reverting the claim. This will allow you to change any details for the client's service schedule (like wrong Pricelist that is used in the Client's Service Schedule). This works on both Invoice batches and NDIS invoices.
These are the topics on this page:
Deleting the Invoice
Open the invoice that you created. If the invoice is for NDIS clients, you can open the list of invoices by going to the clients from main menu and then clicking on the funding claims. If the invoice is for cash, plan managed, self or HCP, you need to click on the invoice batches.

Once you opened the invoice list, double click on the claim record that has the invoice that you want to invalidate.

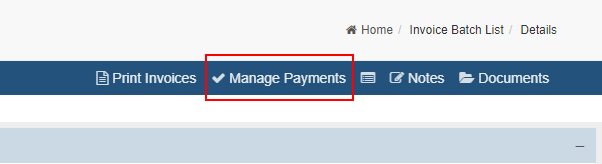
You can invalidate a claim by clicking on the manage payments from the action bar.
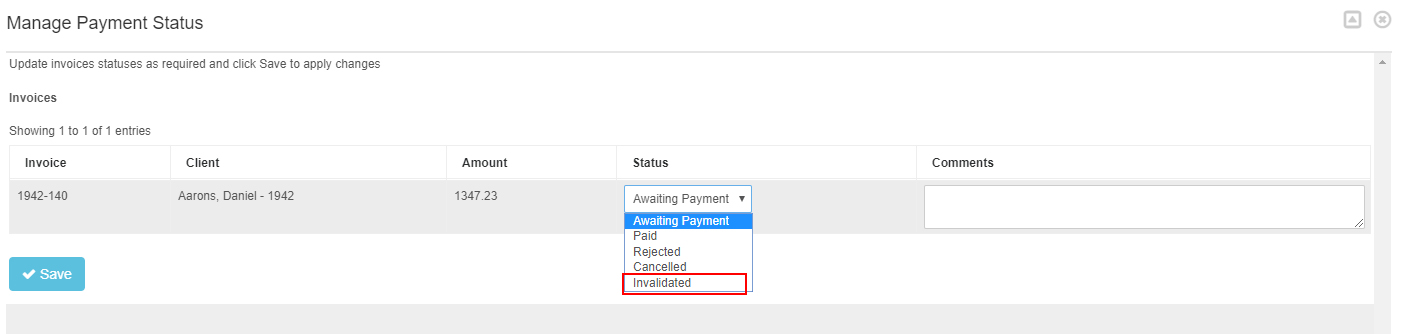
It will open a pop where it will list all the included invoices for the batch claim. Under the status column, click on the drop down and then select invalidated.
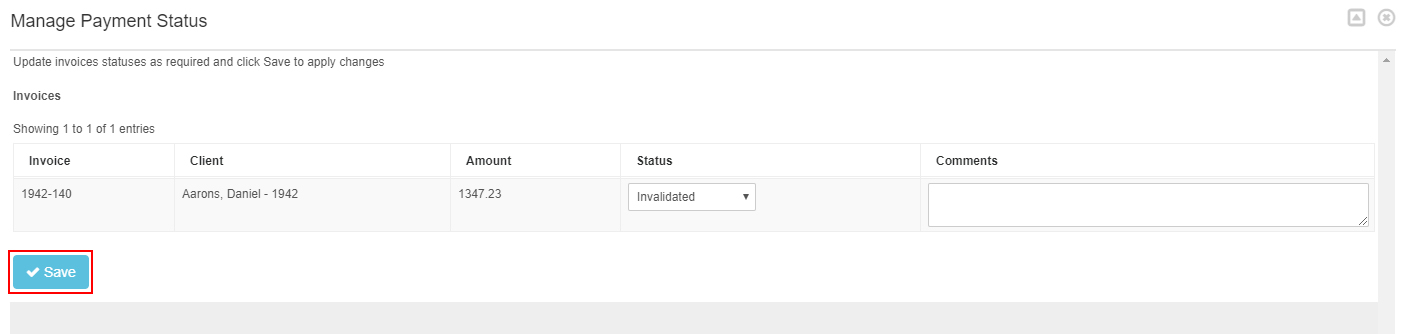
Click on the save button once you mark the claim that you wanted to be invalidated. If there are many invoice for the batch claim, the save button can always be located on the bottom of the list of invoices.
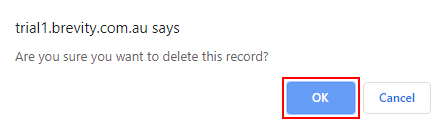
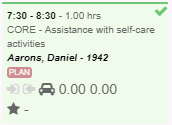
Once the claim has been mark invalidated, refresh the page. The invoice will now have an invalidated status. Click on the delete button to delete the invalidated claim.
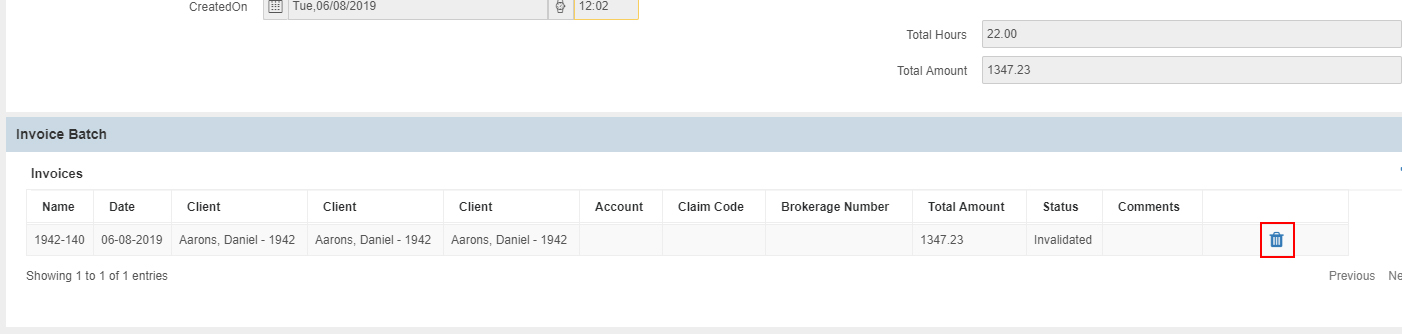
Click on Ok Button to confirm deleting the invalidated claim.
Editing the service schedule
Once the claim has been deleted, the $ sign on the upper right corner of the service schedule will be gone. To edit the service schedule, select the service schedule and then click on the undo complete icon. You can select all the shifts from the view by clicking on the gray icon besides the client's name.
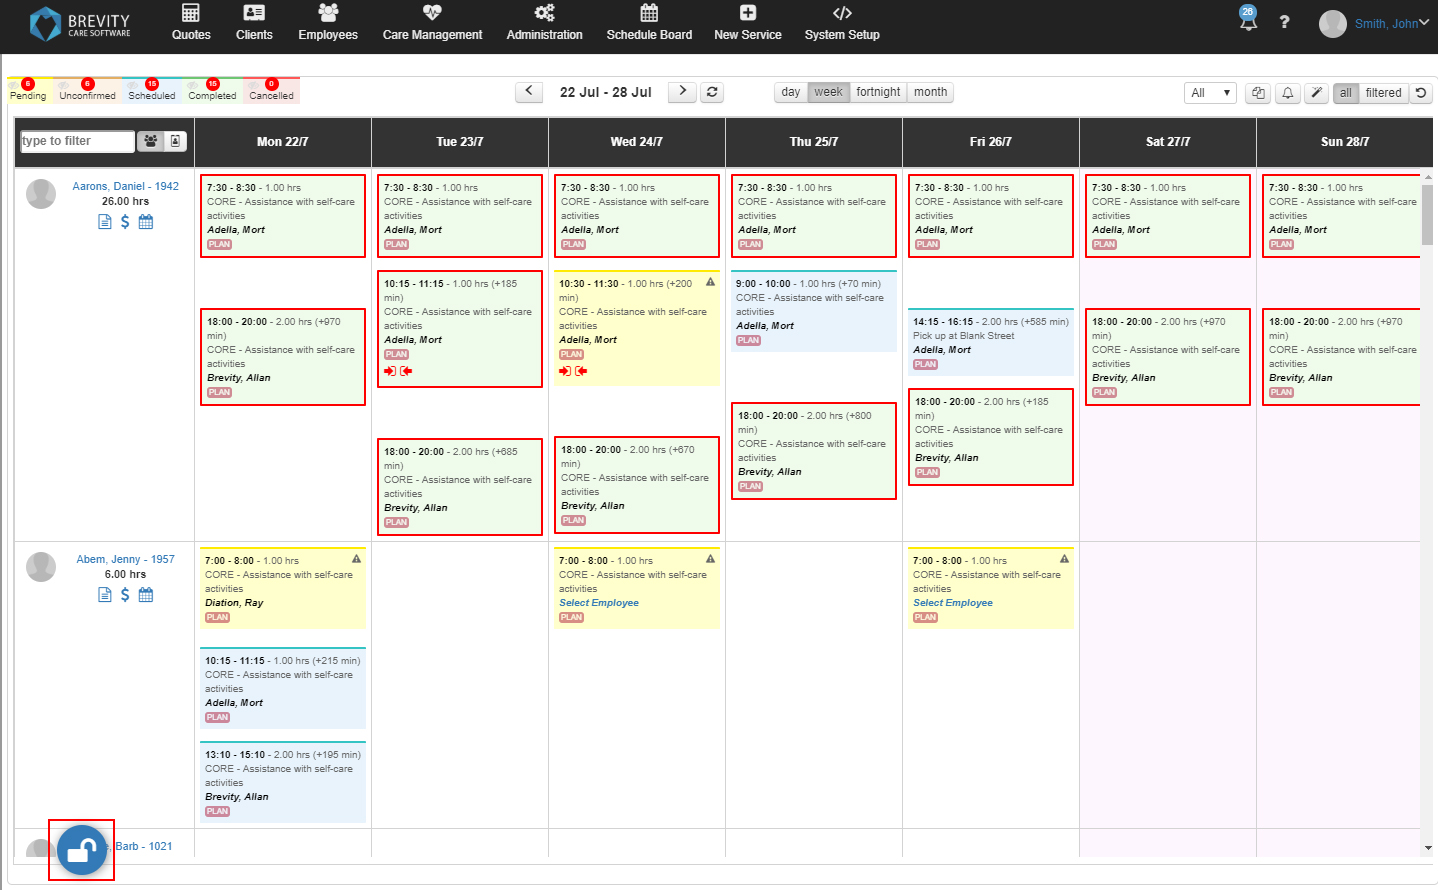
Once you undo the shift, the service schedule will revert into scheduled status. You can now edit the changes for the service schedule.
Re completing the shift
Once you are done with changing the service schedule, you need to manually complete the shifts. To complete the shifts, you need to both complete it from the schedule board and from the employee's approve timesheet.
Completing the shift from the schedule board
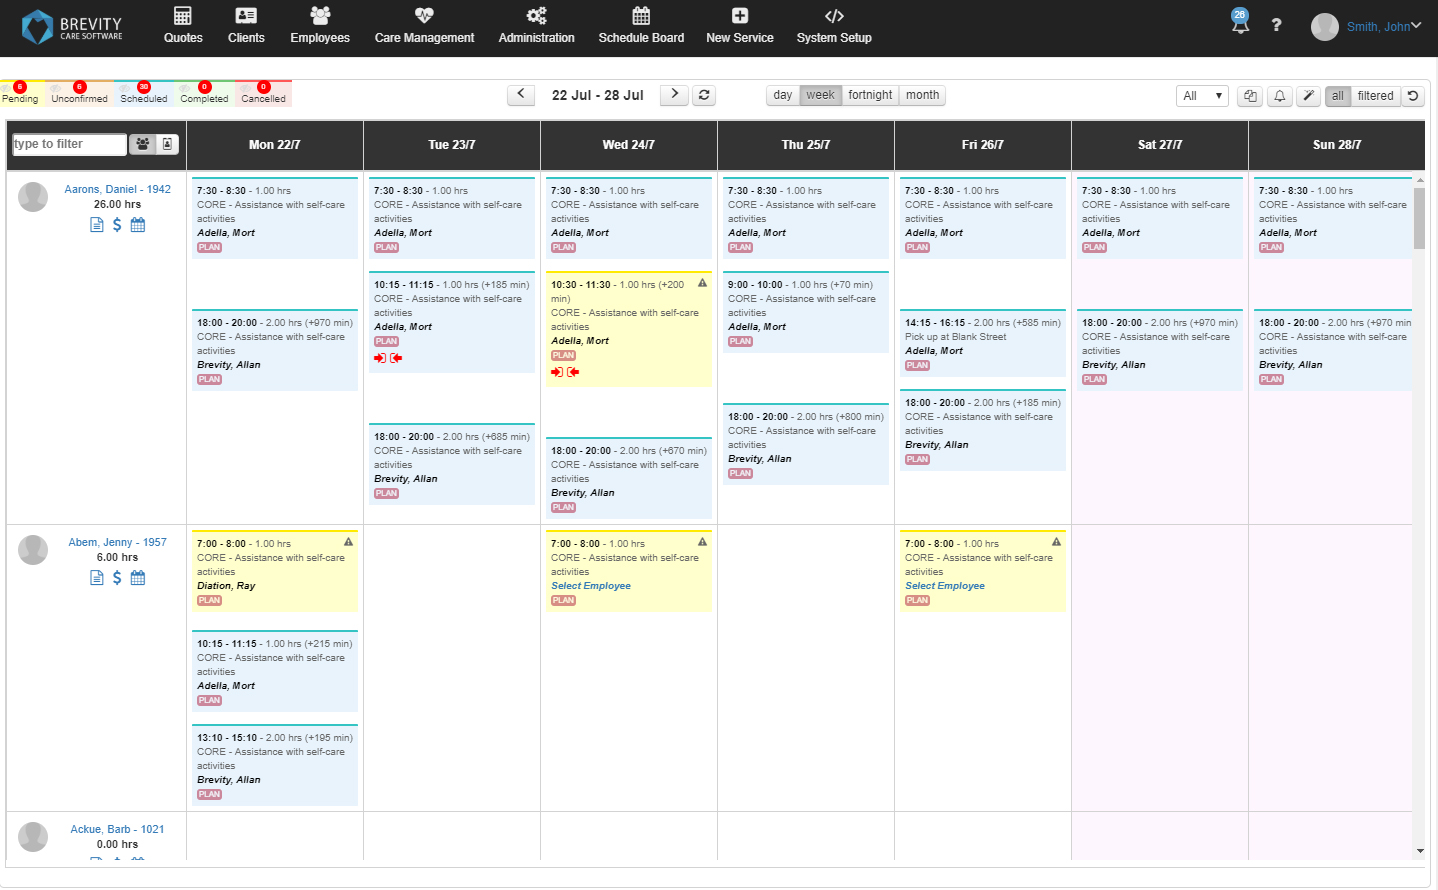
Select the shifts that you want to complete. You can select the gray icon to select all the shifts from the schedule board. Once you select the shifts, click on the complete selected shifts button on the lower right of the schedule board.
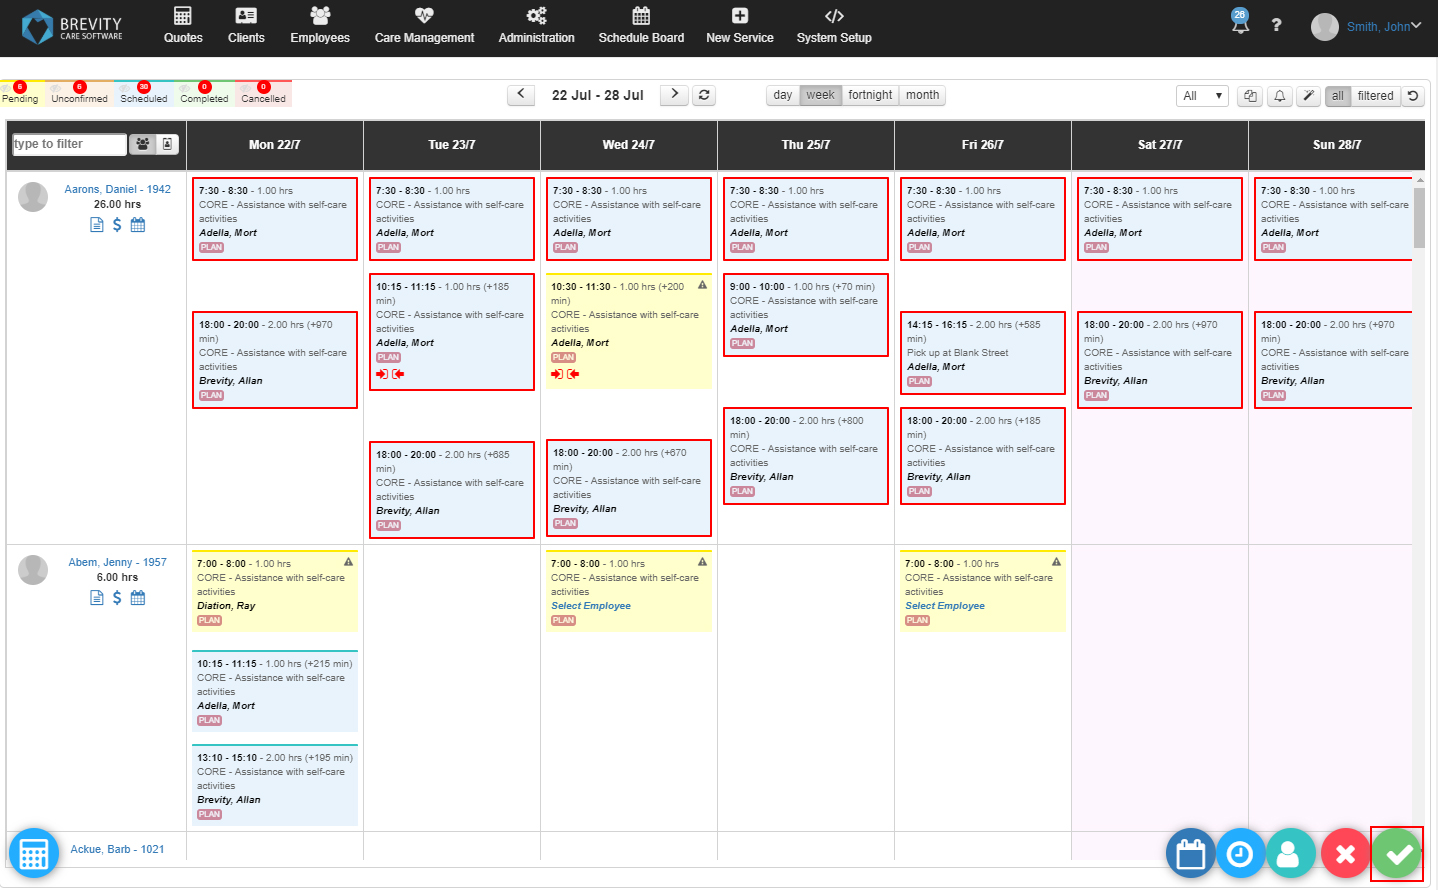
The service schedule will turn into green again which indicates that the shift has been completed.
Completing the shifts from the Approved Timesheet.
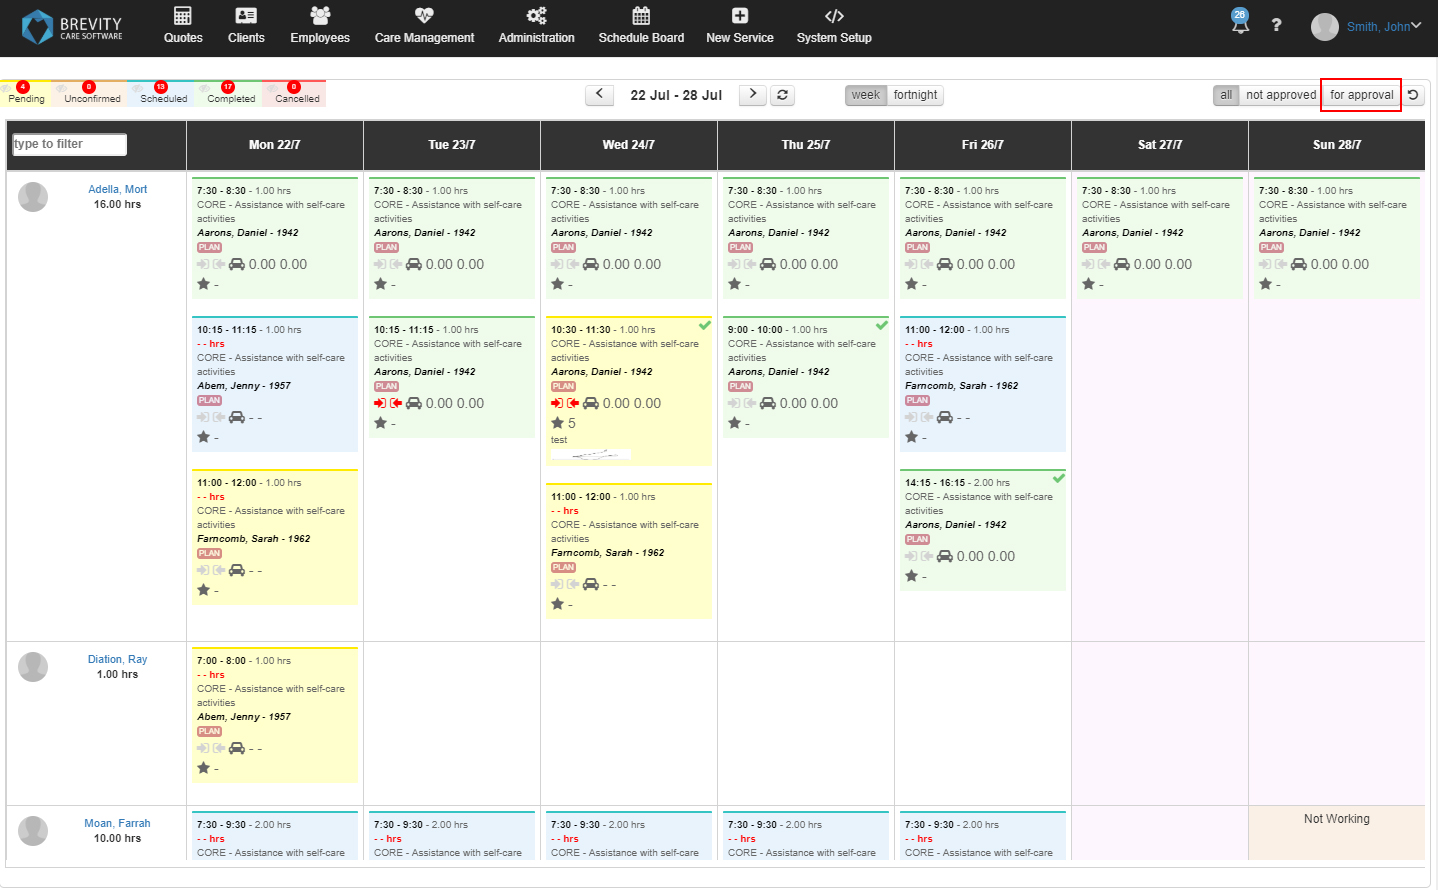
Once you completed the shifts from the schedule board, you need to approve the shifts from the Employee's Approved Timesheet. You can reach the page by going to the Employees from the Main Menu and then clicking on the Approved Timesheets from the sub menu

Once you are in the approved timesheet page, the fastest way to determine the shifts that needs to be approve is by clicking on the for approval button.
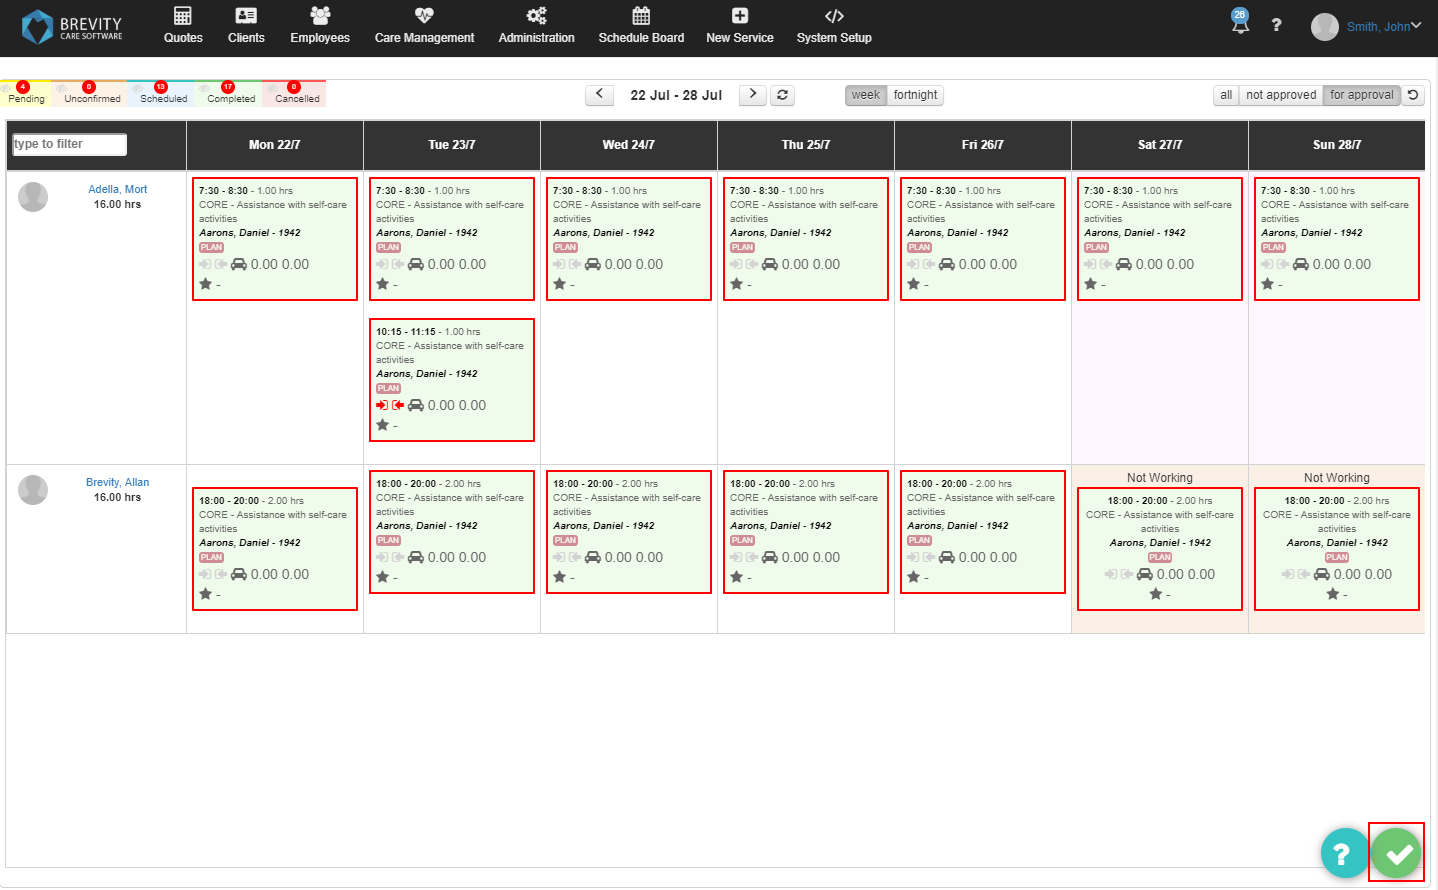
It will show you the shifts that needs an approval. Select all the shifts that you want to approve. You can click on the gray icon to select all the shifts from the view.

Click on the Approve Selected Timesheet button to approve the selected shifts.
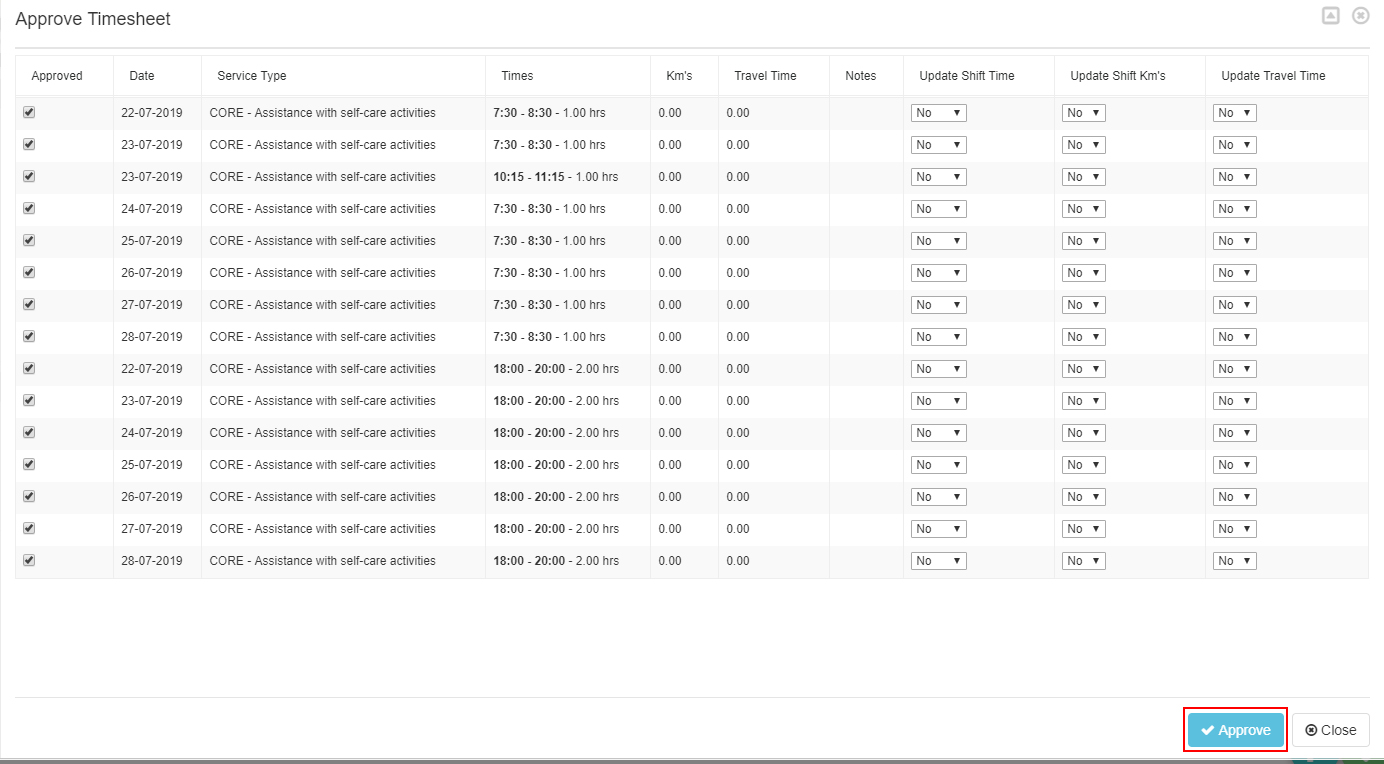
A pop up window will appear. You can see the employee's notes and you can update the shift time, KM and travel time from this page. Once you update the shifts, click on the approve button to approve the shifts.
Once the shifts has been approved, you will see a green check mark on the upper right of the employee's timesheet to indicate that the shift has been approved.
Re creating the claim
Once you approved the service schedule from the schedule board and approve timesheet, you can now re create the claim. On this example, the client has a Plan Managed funding so we will create the funding on the Invoice Batches page. If the client's funding is NDIS, you can follow this guide in creating a NDIS Claim (see Funding Claim)
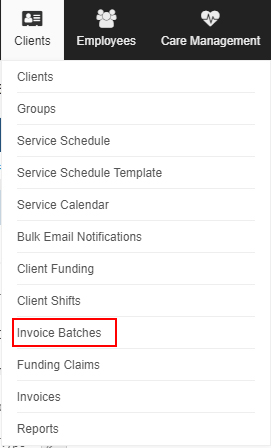
To create an invoice for Cash, Plan Managed, Self Manage and HCP clients, go to the Clients from Main Menu and then click on the Invoice Batches from the sub menu.
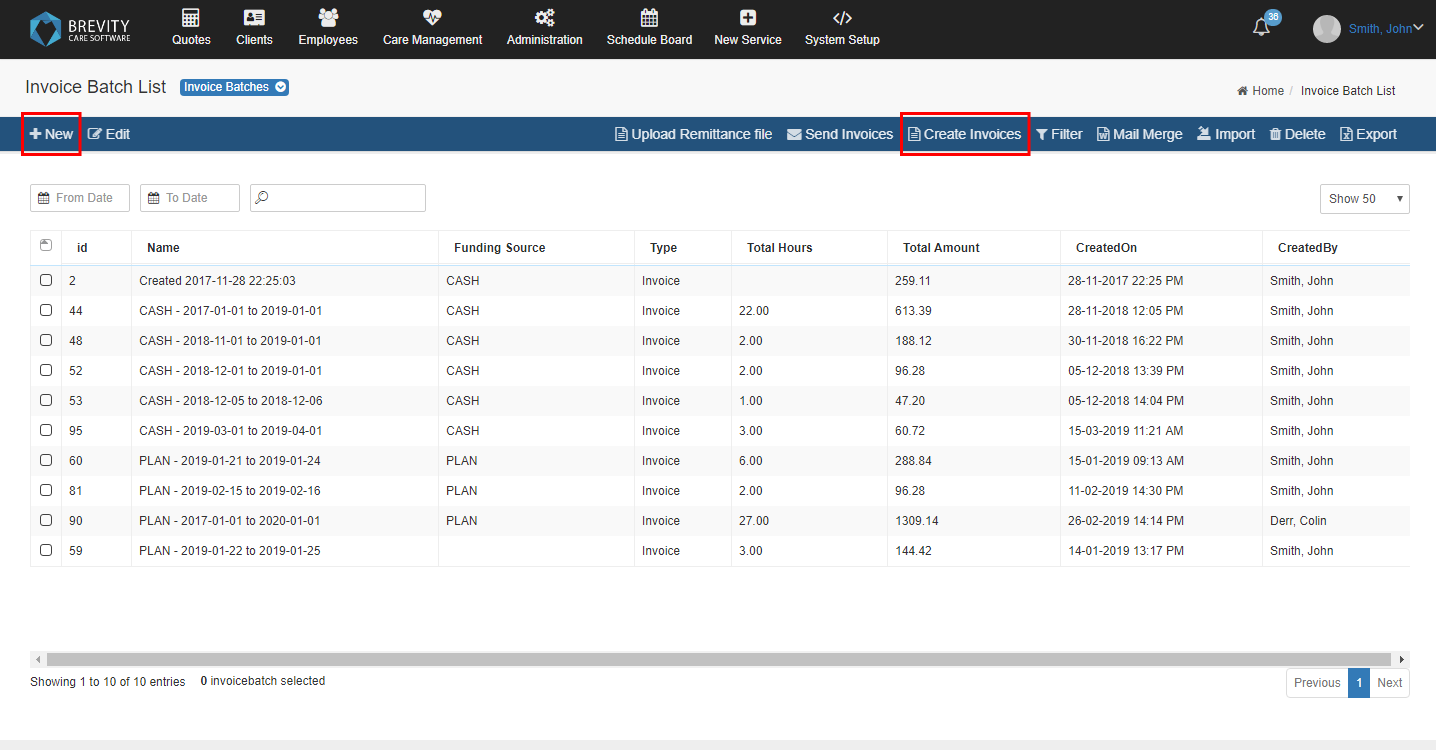
you can create an invoice by clicking on the +New Button or by clicking on the Create Invoices button.
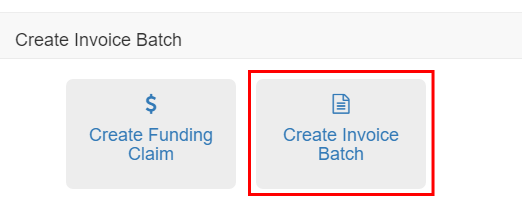
If you select the +New Button, it will show you an option where you can choose if you want to create a funding claim or create an Invoice batch. Select the Invoice batch to create a new claim for Plan Managed Clients.
After clicking on the create Invoice Batch, the create invoice for Clients page will open. From the list of invoice batches, when you click the Create Invoices tab, it will directly open this page.

From the Funding Source, select Plan and then fill in the date(s) that you want to create an invoice. After filling in the details, click on the Next Button to start creating an invoice for the plan managed clients.

From the list of available invoices, click on the checkbox of the client's claim record to select the claim and then click on the generate invoices button to generate the invoice.
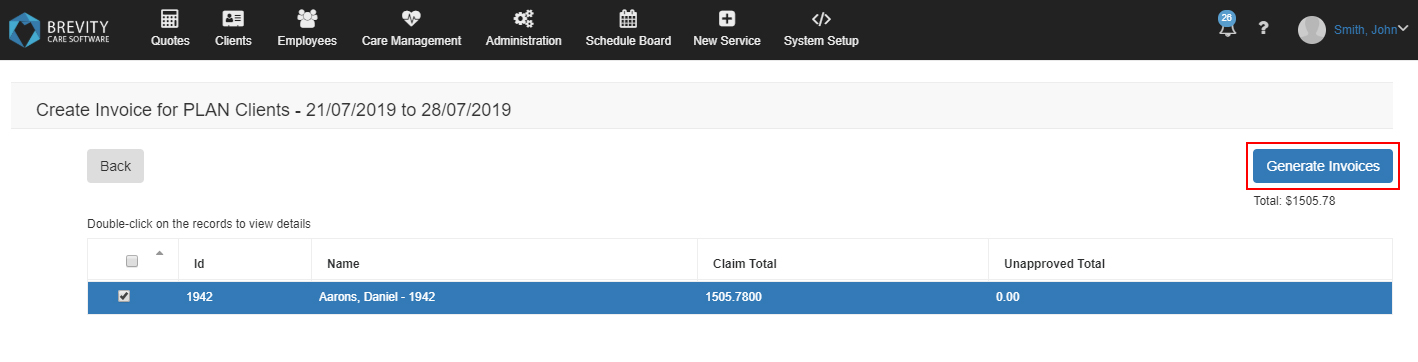
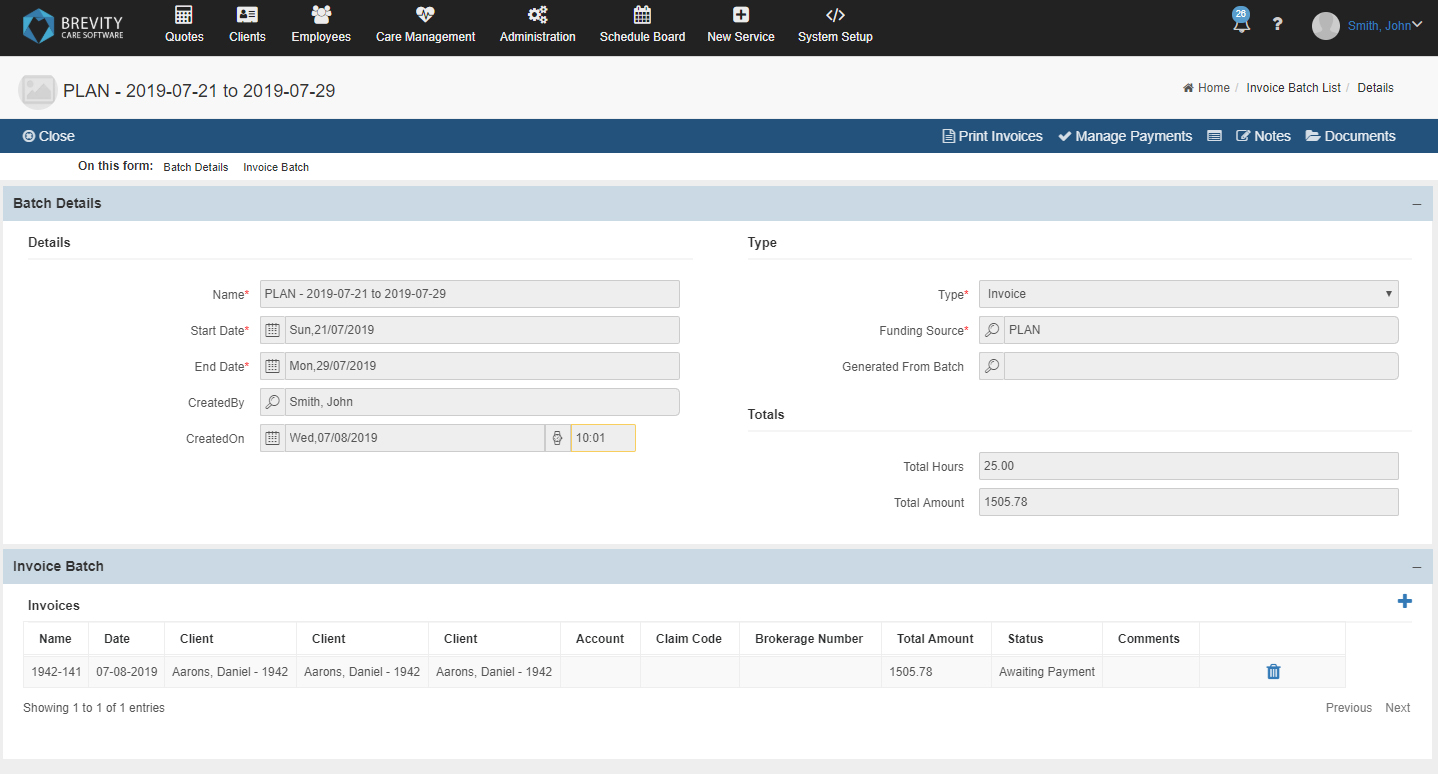
It will now create a New invoice for the client with the changes that you have made.
Copyright © 2019 Brevity. All Rights Reserved