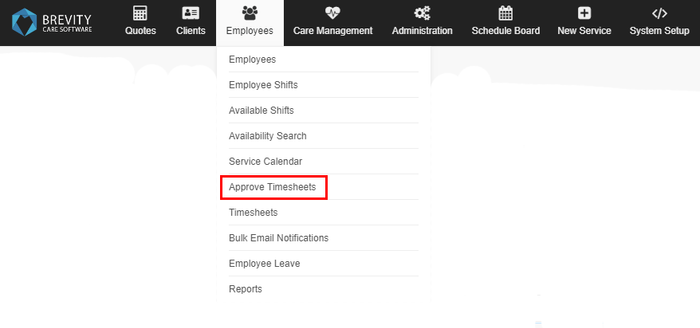
Once the employee finished the shift using the Schedule Board, you can approve their timesheet by going to the Employees from Main menu and then clicking on the Approve Timesheets.
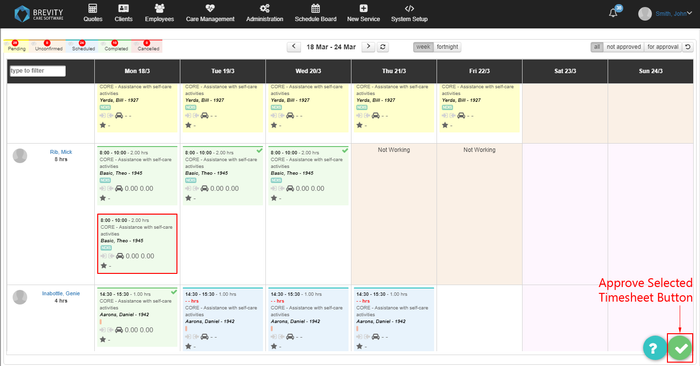
You cannot create an invoice for the completed shift of the client if the employee's timesheet is not approved. You can approve the timesheet of the employee by clicking on the shift of the employee you want to approve and then clicking on the Approve Selected Timesheet button.
A new window will appear after clicking on the Approved Selected Timesheet button. It will display all the timesheet of the employees that you can approve. You can also update the shift time, shift Km's and travel time from this page. Click on the checkbox from the approved column and then click on the Approve button to approve the timesheet of the employee.
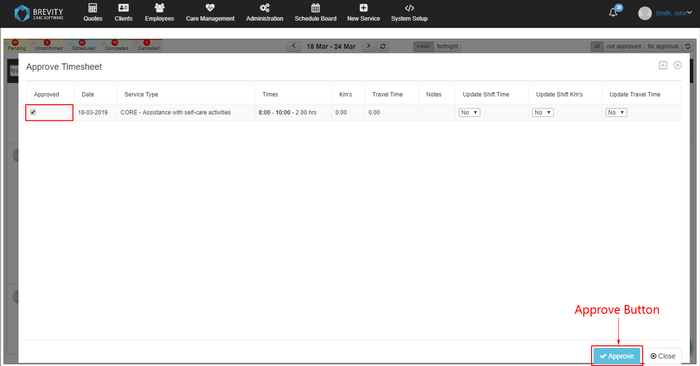
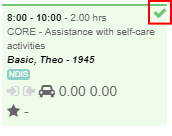
Once the Timesheet has been approved, you will see a check mark on the upper right side of the shift. This indicates that the shift has been approved.
You can also complete the shifts using the Schedule Board. Approving the shifts from the schedule board doesn't need the approval on the employee's timesheet. To complete the shift from the schedule board, select the time Sheets to be approved and then select the "Approve Icon" in the bottom right corner of the window,

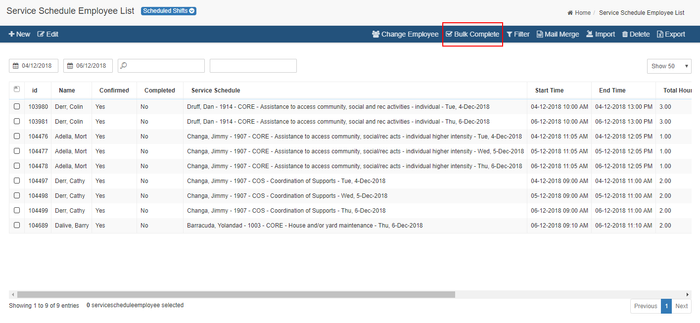
You can also complete the timesheet from the Employee's Shifts section. You can reach this page by going to the Employees from the Main Menu and then selecting "Employee Shifts" from the sub menu. Select the range of date to be approved, then select the shifts that you want to approve. You can use the CTRL and shift key to select multiple shifts. After selecting the shifts, select the "Bulk Complete Icon" to complete the shifts.