There are several ways on how to create a Roster in Brevity. Please take note that before you could create a roster in Brevity, it is necessary to create the client’s funding first. In Brevity, the service schedule will not turn into scheduled status if you don’t create the client’s funding and you cannot create a claim for the client. You could go to this guide on how to create the client’s funding.
Once the Client’s Funding has been created, you can now proceed in creating the client’s service schedule.
Section where you could access the Client’s Funding | Brevity Guide in creating the client’s funding |
|---|---|
Client Funding Page | |
Client’s Profile | |
Client’s Quick Link | https://brevityau.atlassian.net/wiki/spaces/BS/pages/162922598/Client+s+Funding |
Schedule Board | Clicking on the $ sign under the client’s name will open the client’s funding page and follow the guides above on how to create the client’s funding. |
Creating the Client’s service schedule using the Service Template
Service Template is a section from Brevity where you could input all the client’s service schedule details before you could create the service schedule for the client. There are several ways on how to access this page. On the right is the list of how you could access the Service Template.
Section where you could access the Service Template | How to Access the Page |
|---|---|
Client’s Profile | From the Client from Main Menu and then clicking on the clients from sub menu. Double click on the client from the list to open their profile. It will be located on the middle part of the page. |
Client Service Schedule Template Page | From the Client from Main Menu and then clicking on the Service Schedule Template from Sub Menu. |
Client’s Quick Link from Profile | From the Client from Main Menu and then clicking on the clients from sub menu. Double click on the client from the list to open their profile. You can see the Service Template from the left side of the client’s profile. |
Schedule Board | Click on the Paper icon that is located on the bottom of the client’s name |
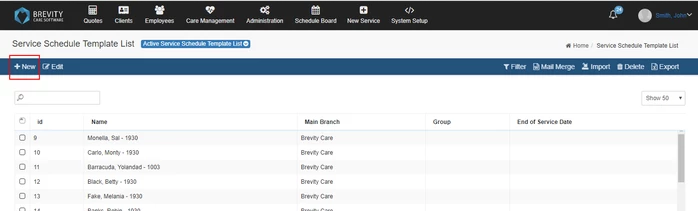
Creating a Service Schedule Template
To add a new service schedule template, click on the + New button.

Select the client that you want to create a service schedule template. You can also type the name of the client, then click save. when the client’s name is already filled in, just click on save to create the service schedule template.
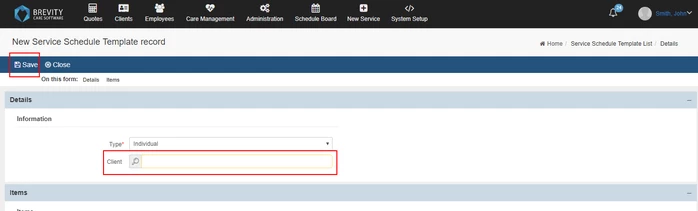

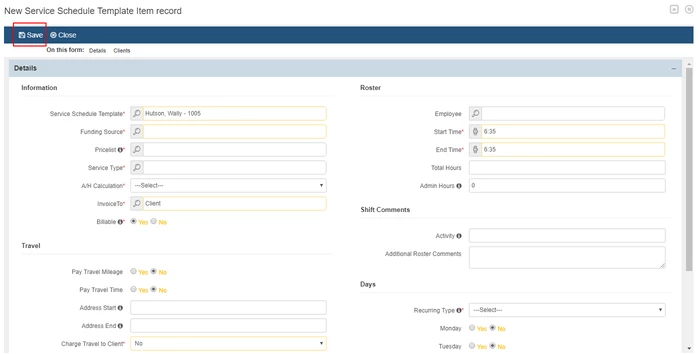
Then you need to add an item to the client. This item will be the template for the service schedule of the client. Click the add button to add an item.


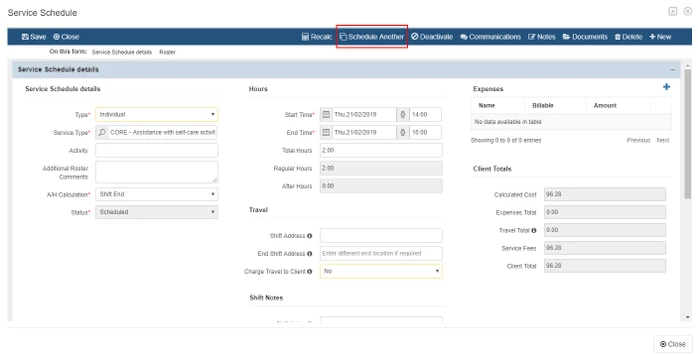
Fill up the information for the service schedule of the client. Once done, click save.

Duplicating the Shift
You can duplicate the service schedule and copy to into other days. Click on the schedule another button to duplicate the shift.

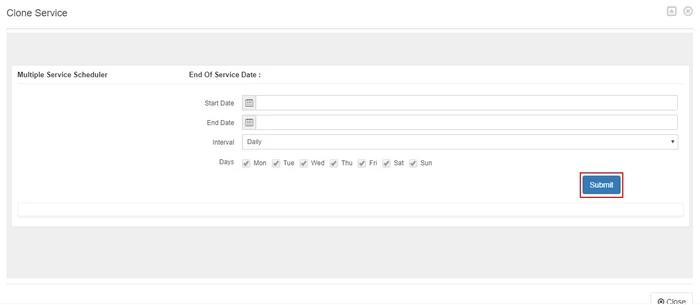
Fill in the details for copying the shift. Once you are done, click on the submit button to duplicate the shift.

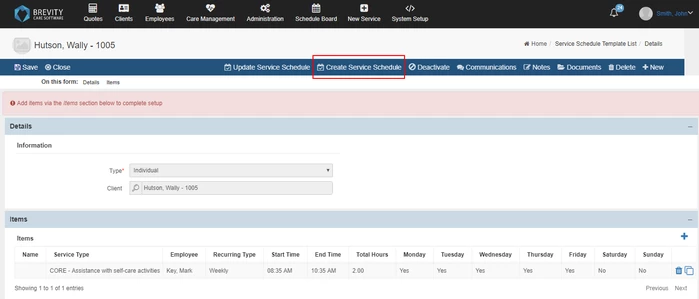
Creating Service Schedule
We need to create a service schedule for the item that we created so it can reflect in schedule board (see Brevity Schedule Board). This page will specify which dates that the item will cover. Click the Create Service Schedule button to add the dates of the item.

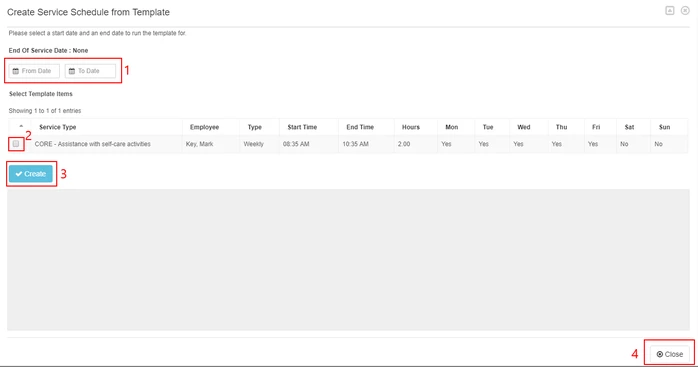
Select the dates for the service schedule. To do this:

Set the dates. From Date is the date first day of the service schedule and the to date is the last day of the service schedule.
Select the service template by clicking the checkbox. You need to select one service type at a time. If you selected two service type, it will show you an error.
Click Create to set the dates
Click close to close the window.
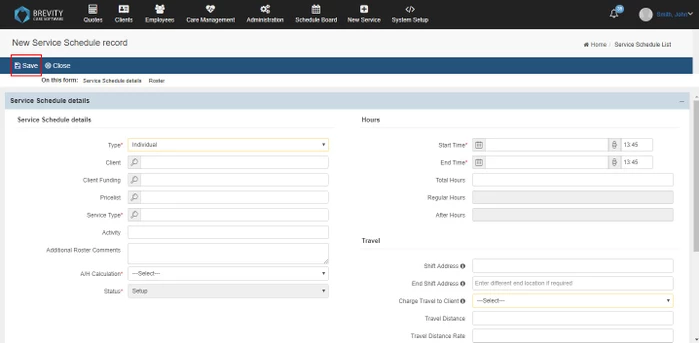
Creating a Service Schedule from the New Service Section
New Service is a section from Brevity wherein you can create an individual or group service schedule for a day. After creating a service schedule using this tab, it will automatically reflect the service schedule on the schedule board.
You can access this page by clicking on the New Service from Main Menu.


You can create a service schedule on this page. Fill in the details for the service schedule and once done, click on the Save button

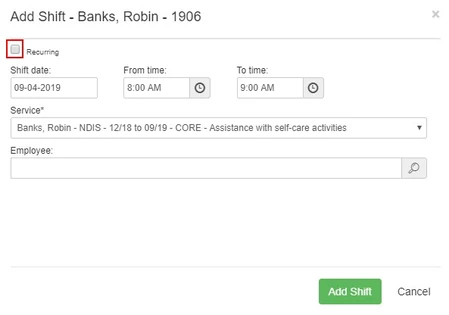
Adding a shift from the Schedule Board
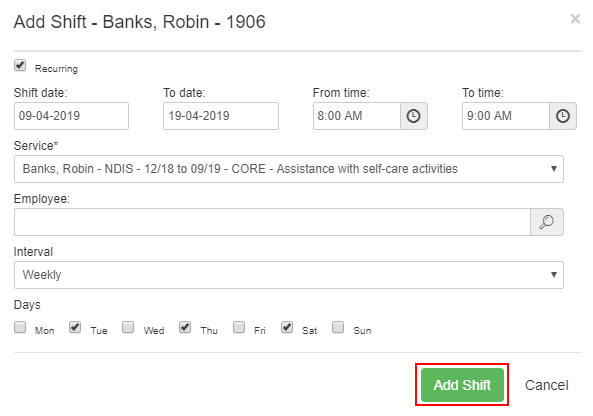
If you want to create a recurring shifts, Click on the + button from the upper left portion of the shift box.


Fill in the details like adding a single service schedule. To create a recurring shift, click on the recurring shift check box.

After clicking on the Recurring check box, the To date and Interval fields will be available.
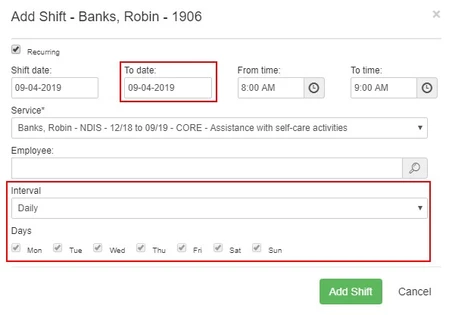

Fill in the details for the recurring shift and then click on the Add Shift button to create the recurring Shifts