| Anchor | ||||
|---|---|---|---|---|
|
...
| Section | |||||||||||
|---|---|---|---|---|---|---|---|---|---|---|---|
| |||||||||||
|
...
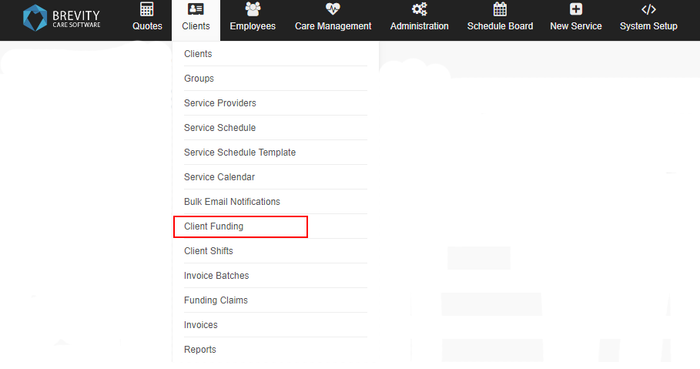
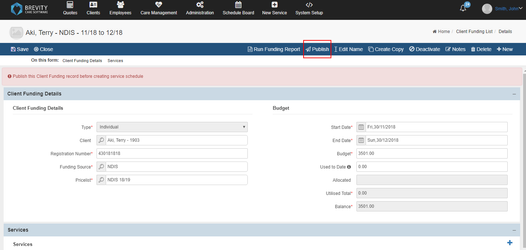
Creating a Client Funding
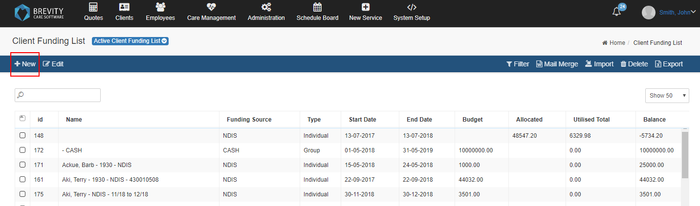
On the client funding list page, click the + New button to create a new client funding list.
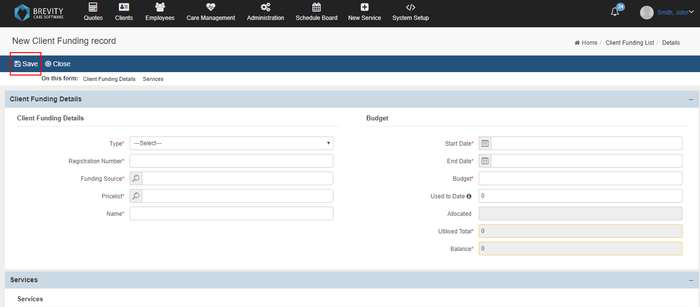
A Client Funding screen will pop-up. Fill out all the information as follows:
- Type: Select Individual
- Client: Will auto-populate with the client name and doesn't need to be changed
- Registration Number: Enter the clients NDIS number here
- Funding Source: Select NDIS
- Price list: Select the price list that will determine the charge rates for services delivered to the client, as per the service agreement
- Start Date: Start date of the service agreement
- End Date: End date of the service agreement
- Budget: Total budget of all services
Click Save after filling out the information
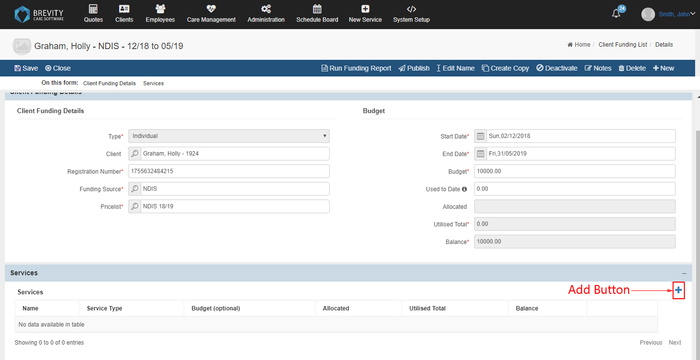
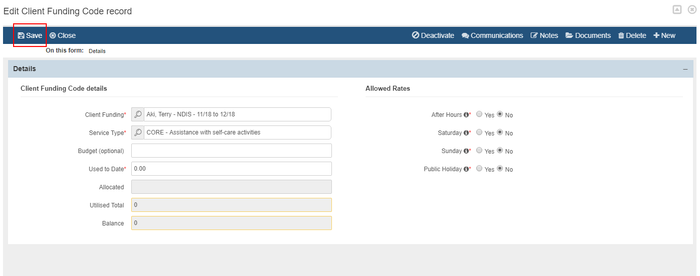
After Saving the Client Funding information, the Services section at the bottom of the screen will now be available, that allows you to add all the services that the client is funded for - these will be used for tracking the budget as well as determining the correct NDIS support numbers to use when generating claims from Brevity. You need to add a service for the created funding. To create the service, click on the add button under the services tab.
Fill-out the information as follows:
- Service Type: select the name of the funded service from the service agreement. If you not sure you can click the search icon and search using the NDIS Support Number. Brevity automatically manages to claim for after hours codes - you just need to select the normal hour Support Item, and specify if after hours are allowed using the options on the right. For services that NDIS does not pay after hour rates for, the option will be disabled by default. You can enable these if you wish - click here for instructions on how to do this.
- Budget: enter the budget for this service from the service agreement
Click Save to add the service. Click Close to return to the Client Funding screen to see this service now added to the list. You can click the plus again to add additional services. You can also double-click an item in the list to modify it.
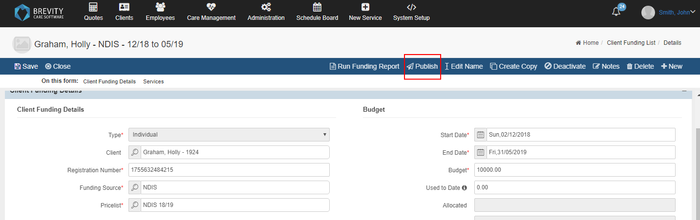
After creating services, you must publish the client funding before you are able to use it for rostering. You can unpublish at any time if you need to make changes, which will unpublish related services on the roster as well. This ensures the rostered services still fall within the parameters of changes you have made (date or budget changes).
...
Editing Client Funding List
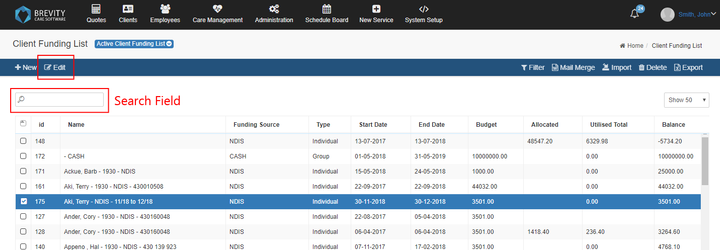
Under the client funding list, you can search for the client fund by using the search field and typing the client's name. Click the client's name and click edit. You can also double click the client's name to modify the client's fund.
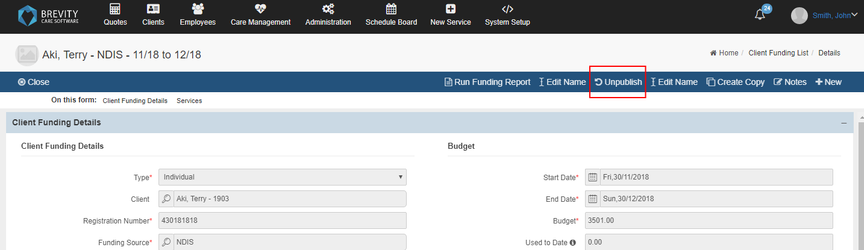
Before you can edit the client's fund, you need to unpublish it first. Click the unpublish button to enable the editing of client's fund.
It will have a pop up if you want to unpublish the fund. Click ok to confirm
Change the details you want to change and then click save
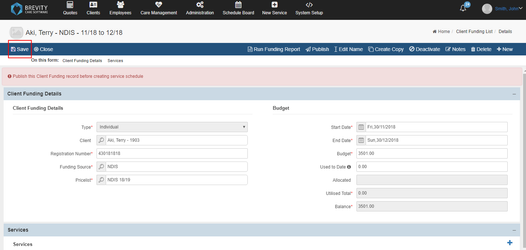
Click Publish again so it can be available again for rostering.
...
Editing and Deleting Services for Client Fund
Before you can edit the services for client fund, you need to unpublish it first. You cannot edit the service if the client funding is in publish mode. (See the steps above how to unpublish the client funding)
Double click on the service if you want to edit it.

Change the fields you want to edit and then click save to save the changes.
If you want to delete the service. click on the delete button on the far right side of the service.

...